How To Easily Use Multiple Smart Bulbs In One Fixture
Updated on 5th Mar 2021 15:28 in Home Assistant, IoT, Smart
Sometimes when building a smart home, not everything integrates smoothly, and one of the most common issues people run into is installing multiple smart bulbs into one fixture. At first, this issue may seem trivial, you can just install the smart bulbs just like you would any other bulb. However, most of these bulbs are designed to be controlled from an app - and there isn't always a clear way to mark them as being installed in the same lamp.
This isn't the only problem you might face when trying to replace more complex lighting setups with smart bulbs. Things like the bulbs not physically fitting in the casing, fixtures that have multiple sockets that are too close together, are all the kinds of problem you could encounter. Let's look at some of these common problems and possible solutions for each one.

Table of Contents
Multiple smart bulbs in one fixture
This one is specifically for when you have managed to install many bulbs into the lamp you're using, but now you're facing a software issue. How do you get all of these individual devices to show up as a single lamp? This is very annoying because now you have to click on three different switches just to turn the light on or off! Depending on what smart home system you are using, there are possible solutions, but here we will be giving instructions for Home Assistant.
Keep in mind similar steps should exist for most conventional smart home systems as this is a fairly common requirement. If your system has no function similar to this method, check out the end of this section for other options.
Grouping bulbs into one fixture with Home Assistant
Within Home Assistant, it is quite easy to group multiple smart bulbs together into one entity that can be turned on or off with one switch. Using the "Light Group" integration which is part of Home Assistant core (meaning you don't need to install anything) you can list entities that you want to turn into one. Unfortunately, it isn't possible to configure this using the UI but the process for adding it to configuration.yaml is relatively straight forwards.
Consider the following snippet:
light:
  - platform: group
    name: Nightstand Lamp
    entities:
      - light.nightstand1
      - light.nightstand2
      - light.nightstand3
This should be located under the "light" section of your configuration file, or in the case where you don't already have this section, merely adding the entire snippet will work. The first line defines the section that the integration falls under, in this case, it's light. The next line describes the name of the collection of lights, for this example, we use "Nightstand Lamp".
Finally, we list the entities we want to be included within this group under the "entities" line. In this case, I've named all three bulbs inside the fixture its name along with some number. You can use any name you want but obviously since each bulb needs to be added individually they will need different names, preferably one that can help with identification.
A few notes about this, the entities that you list must already exist - they should already be configured before you add them here. It is also important to be very careful of the spacing in this file! If you put the wrong number of spaces or tabs on a line, then the entire system won't boot correctly! If this happens, check the Home Assistant log file for hints about what you might have done wrong. Alternatively, use an online YAML checker to verify that the config file is correct.
Once the config is done, restart Home Assistant by using the helpful button under Configuration->Server Controls->Restart in the UI. Once the system restarts and comes back, you should be able to see the new entity listed under the entity list. In my case I added it to my UI by clicking on the three dots in the top left->Configure UI, then clicking "Edit" under the card I wanted to add this lamp to followed by adding the entity "Nightstand Lamp".

Clicking on the Nightstand Lamp entity will open the light control pane where all lights in the group can be controlled as if they are one. Since I added a device with RGB to this group, the screen shows a colour wheel - but only devices that support RGB will be affected.
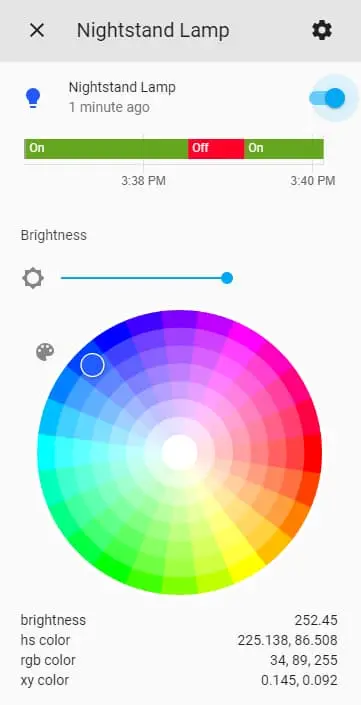
One of the best parts of this grouping is that regardless of what kind of device you put into a group, the top-level will always have the same features that the children have. This means that you can put RGB lights in the same group as simple ON/OFF lights and the group will have both a toggle switch along with a colour wheel.
Grouping multiple bulbs into one fixture with Alexa
Many people use Alexa to control their smart home, whether via voice commands or just with the app. The problem of a lamp with multiple bulbs can also be solved within the Alexa app, although not nearly as well as in Home Assistant. The most obvious way to accomplish a grouping is to use the "Group" feature in the Alexa app located in the menu that appears when you click the "plus" button in the top left of the "Devices" page. As of the time of writing, there are some big problems with this technique that we will look at it in more detail later in this article. First, here is how to use multiple smart bulbs in one fixture with Alexa!
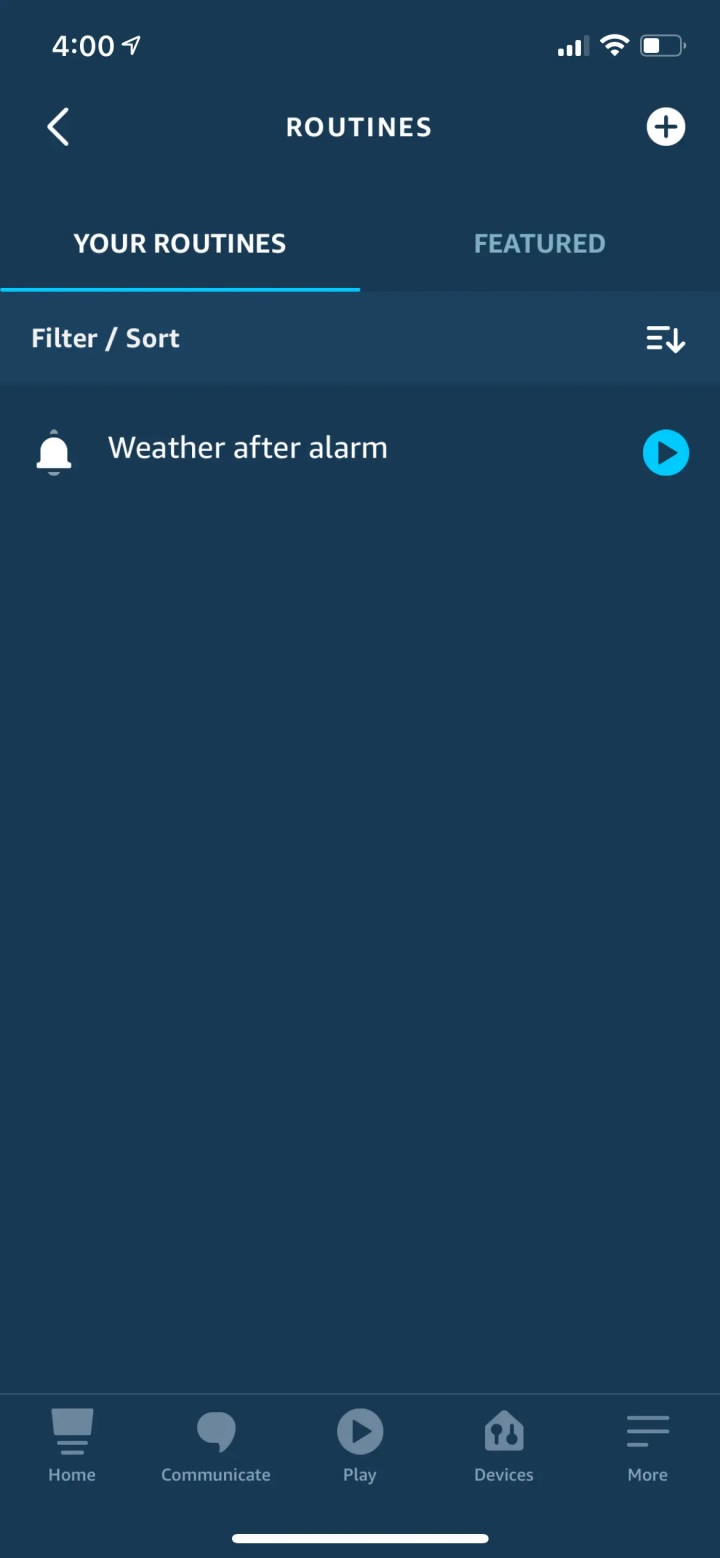
The first step is to go to the "Routines" page. It can be accessed by going to the "More" menu and clicking on "Routines". Click on the "plus" sign in the page's top right to create a new routine.
On the new routine page, you will see the option to enter a name, a trigger, and a list of actions.
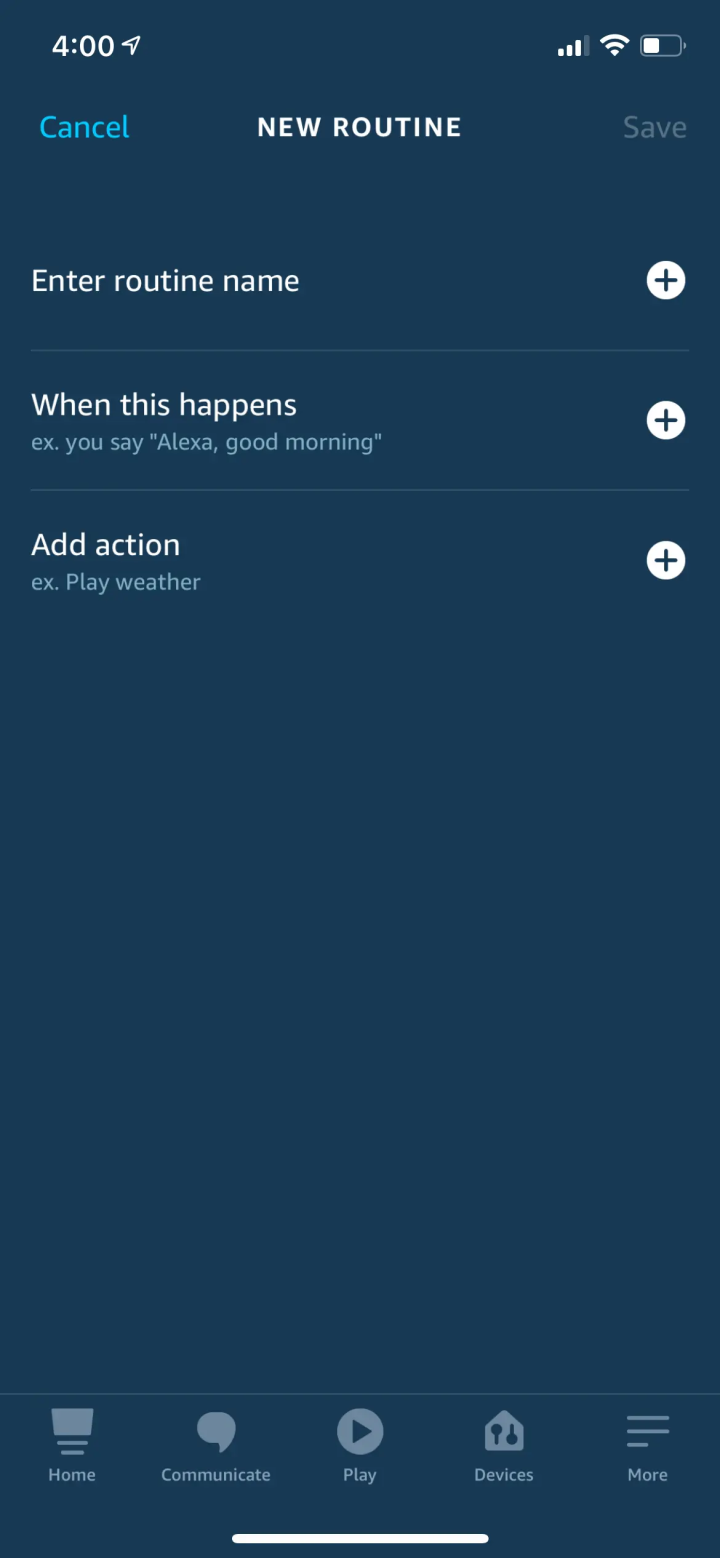
Feel free to set the name as anything you see fit by clicking on "Enter routine name" I choose "Living room lamp red". You might already see where this is going, but the next step is to set your actions. Click on add action to begin. Once the next screen appears, there will be a long list of possible action categories. You want to click on the one called "Smart Home".
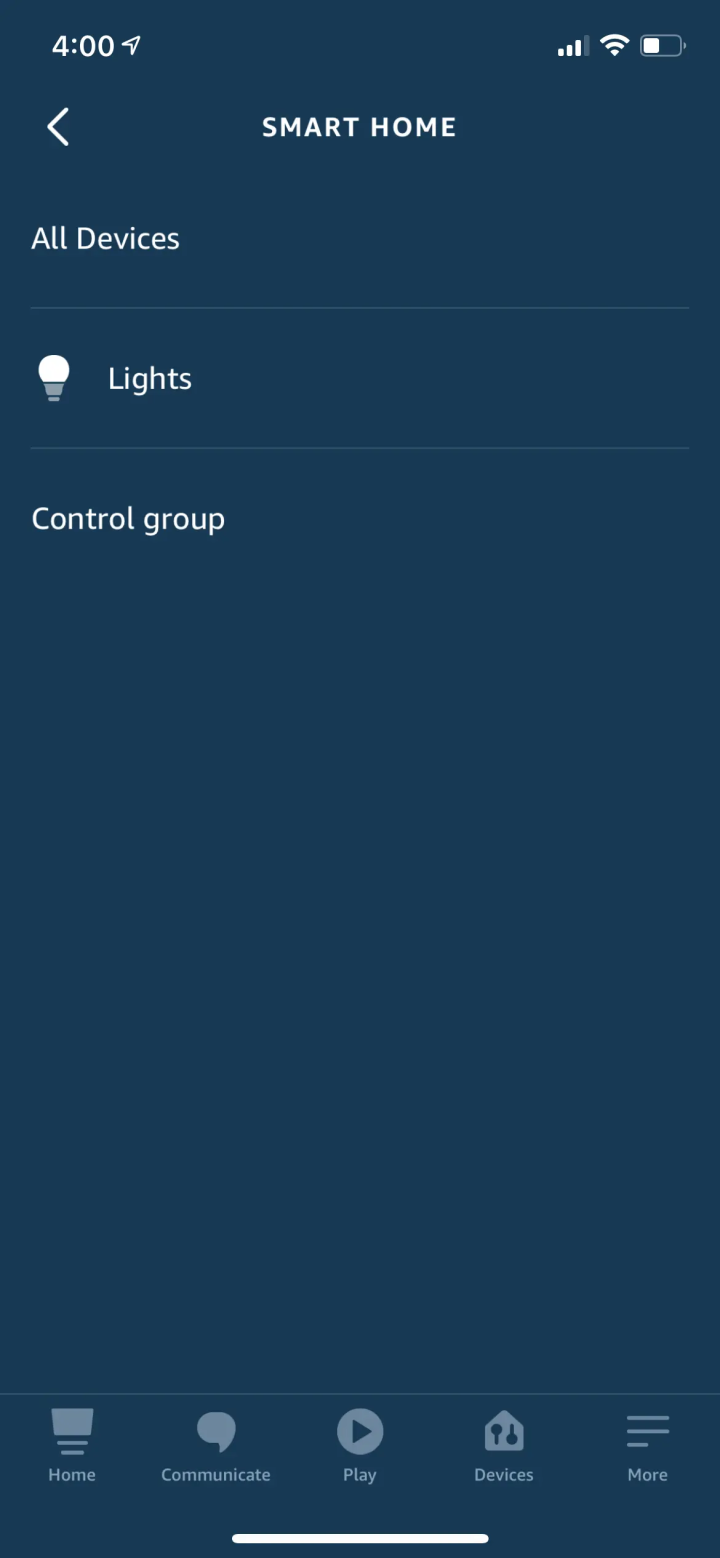
In this case, select "Lights". You can use this technique for any type of device that you want to control multiple of, but we will be sticking to lights for this article. The next screen will prompt you to select the specific device you want to add, be sure to select one of the bulbs inside your lamp. I named mine "Living room lamp bulb 1" and "Living room lamp bulb 2" when I added them to Alexa to make them easy to identify, but they don't need to be named any special way. Once you've selected one of your bulbs, click next.
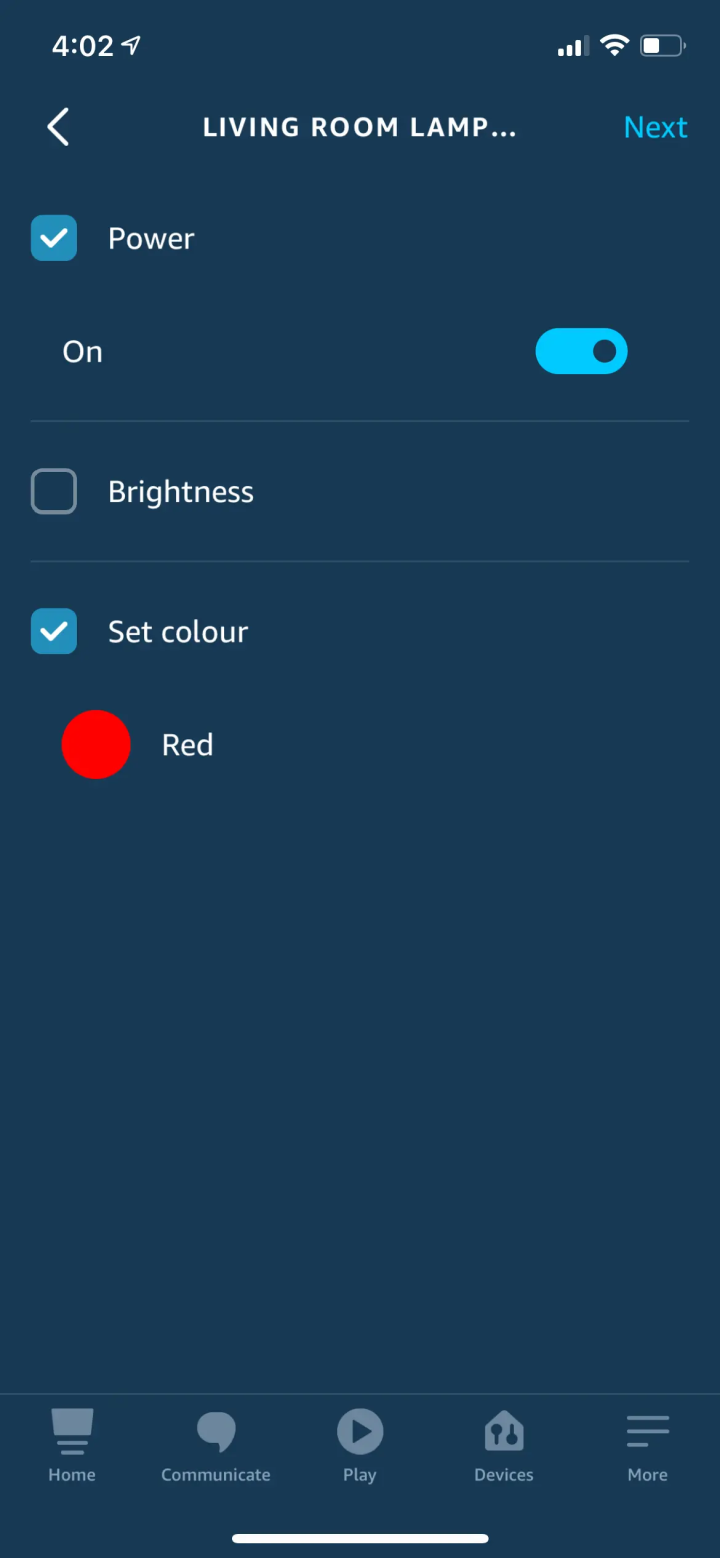
You can see that my settings are "Power = On" and "Set colour = Red". We specify the power to ensure the bulb is on when we run this routine, but the real work is done by the "Set colour" option. Pick whichever colour you like and then click next. You should end up back at the routine screen where you set the name earlier. Repeat this "add action" step as many times as needed to include all the bulbs inside your fixture. Once you're done, stay on the "New Routine" screen to set the "When" trigger.
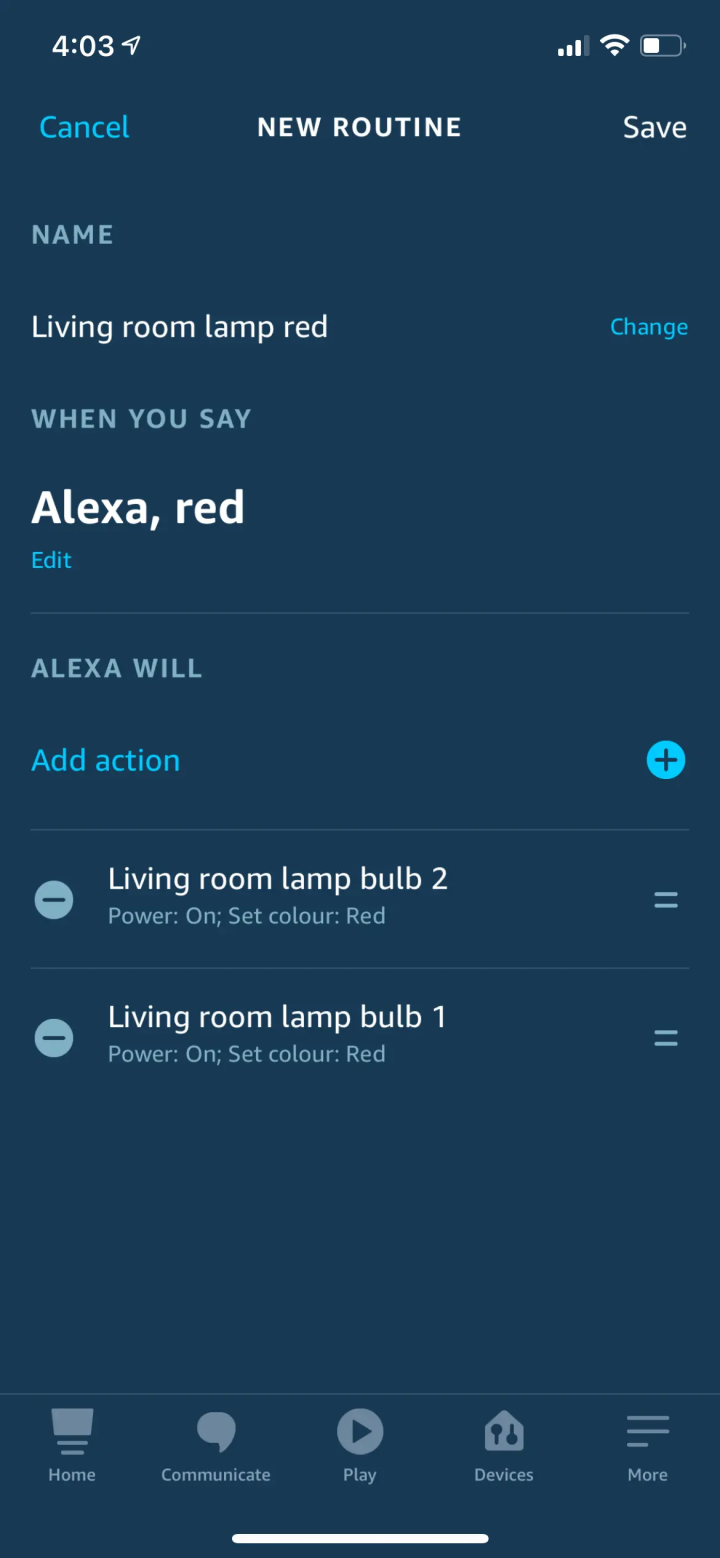
You can see I have set the trigger to "When you say". I picked "red", but you can pick anything you like. You can also use any of the other triggers if you are interested! Notice that I have two actions specified in my case, one for bulb 1 and another for bulb 2. They both have the same specification, which will result in them both doing the same thing. When you are done, you can click on "Done" in the top right to save this routine.
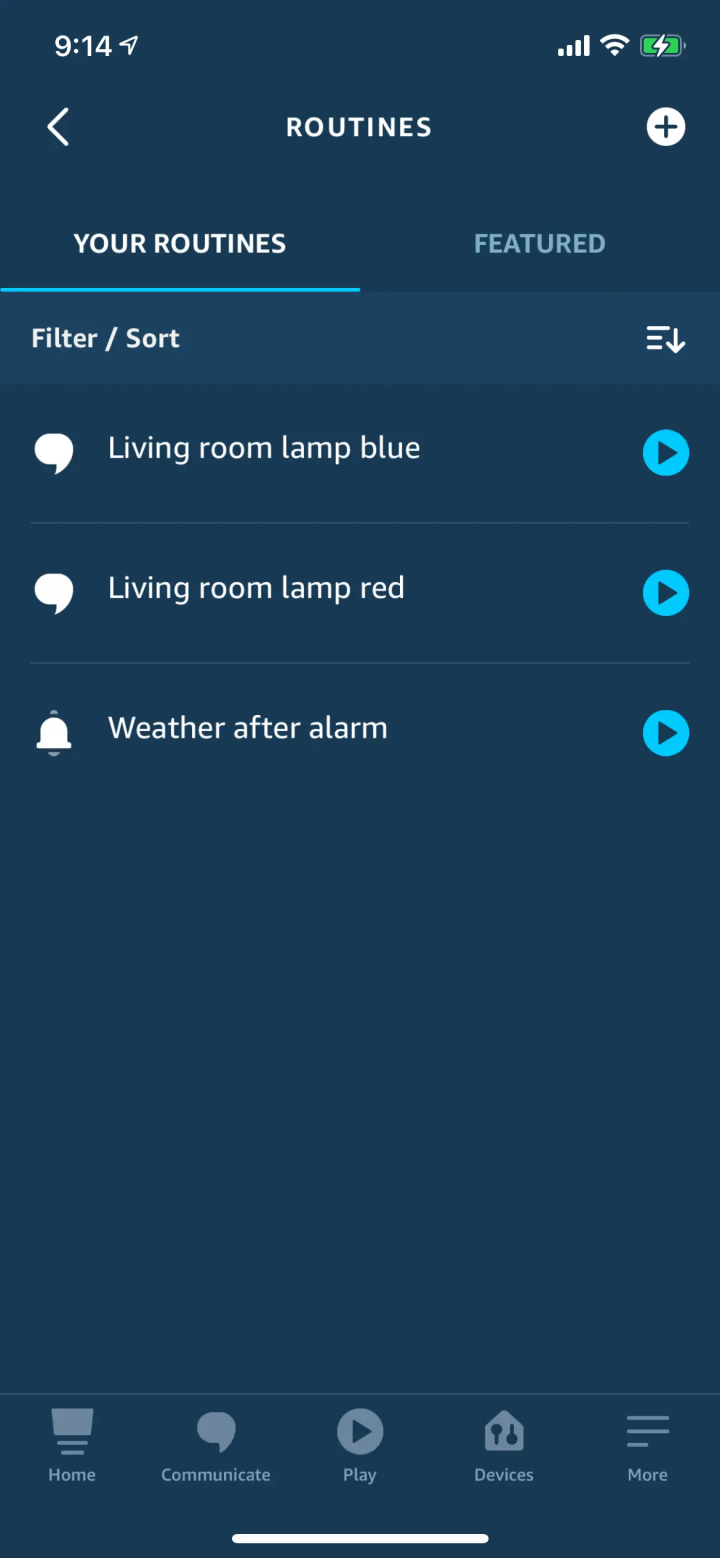
I repeated this entire process twice to end up with two routines specified. One of them is to turn the lamp red and the other one to turn it blue. You can keep creating new routines until you are satisfied with the amount. Clicking on one of the "play" buttons next to a routine will trigger it, causing the lamp to change colour. I have created a short video demo of this process in action below.
What about Alexa groups?
Unfortunately, as of the time of writing, it seems that the Alexa group function only supports basic operations. To test it, I created a group from the device page by clicking on the plus sign. I named it "Living Room Lamp", and I added two bulbs. Once the group was made, the "Lights" page listed the newly created group with a master "ON" button. That's a good first impression, now if we click on it, we will be able to see a more detailed view.
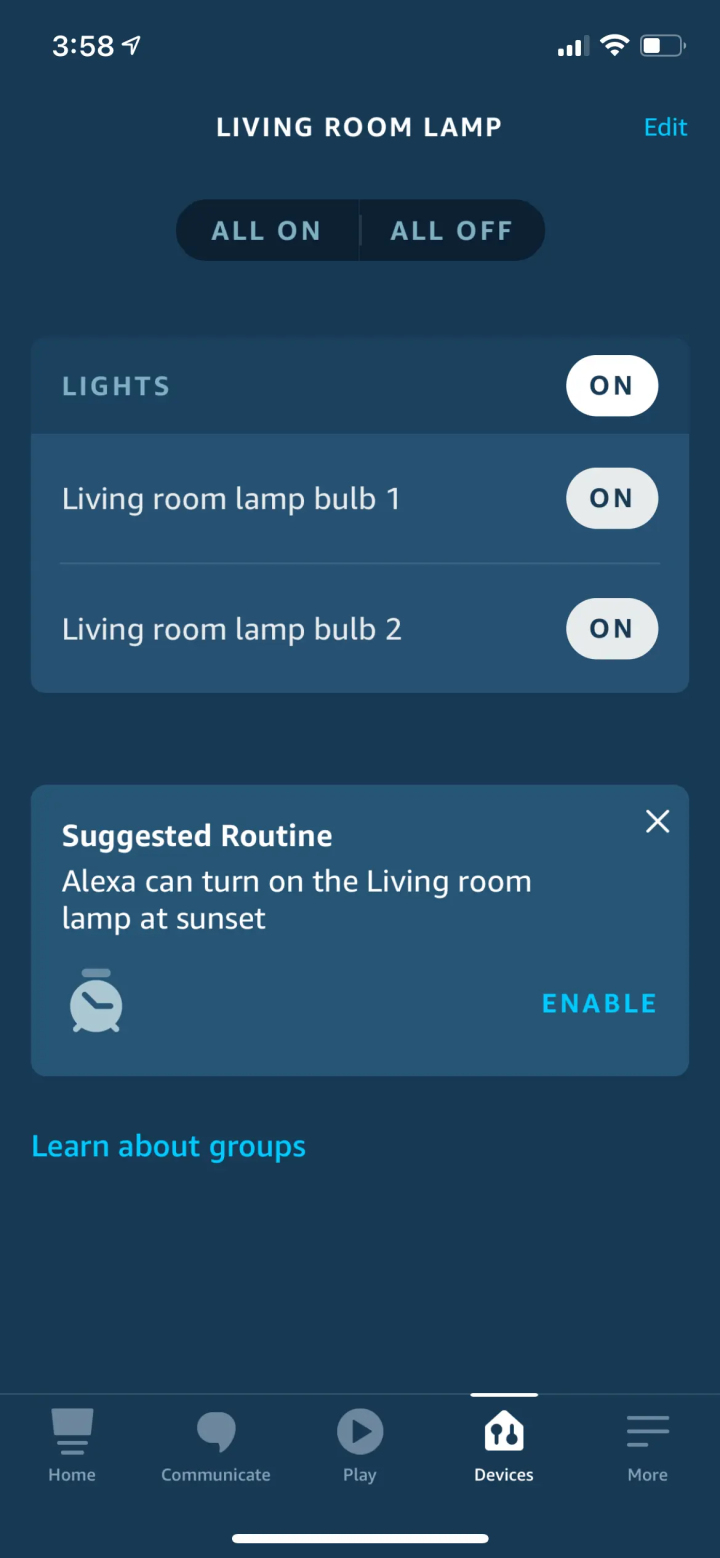
Once you get to the detailed view, you will notice there aren't any buttons other than power! This is the part where I am not sure who is to blame. I used two Meross WiFi Smart bulbs, which have served me well over the years. The real question is, does the device manufacture or Alexa impose this limit? As it turns out, this question isn't that easy to answer. The Meross app also presents a similar limitation in that it doesn't support groups at all. As such, is this an Alexa limitation or a smart bulb limitation? I'm not totally sure. If you know the answer, please let me know in the comments below!
While there are ways around this using Scenes in the Meross app that Alexa can connect with, the lack of a similar grouping function like the one found in Home Assistant is a bit disappointing. The ideal functionality is to group any device with similar devices and to make the common features available to the group. As such, if all the devices in a group can change colour, the group should have a colour wheel. If you currently use Alexa and are missing this feature, you can always integrate Alexa with Home Assistant to get the best of both worlds.
What about when no grouping function is available?
If the smart home system you use does not support groups, all hope is not lost. There is another solution that can work. The trick is to use a very commonly supported function called scenes to create templates of each state we want the lamp to be in. This is a lot less ideal than having a real grouping because each individual state will need to be created as a scene - which is okay for turning things on or off but a lot less practical when it involves RGB.
Simply follow the instructions for whichever smart home system you are using to create at least two different scenes that include only the devices that are a part of the fixture. One of the scenes should consist of all of the bulbs being off and one with all of them being off. Now just switch from one scene to the other to turn the fixture on or off.
Fixtures that have physical problems
Sometimes there is just no way to make it work - the fixture does not have enough space to install smart bulbs in every socket. If this is the case, there are a few options - though none of them are quite as good as having all smart bulbs.
Only filling one or two of the sockets
This is a straightforward solution, but in some cases, it might work and even save you money! If the fixture does not expose the bulbs and brightness is not a big concern, try only putting one or two bulbs in. In the situation where you put two, it will still be necessary to use one of the tricks mentioned above, but if only one is used, it can now be used as a regular lamp since there is only one bulb installed.
Using a smart switch instead
In some instances, it might be better to use a smart switch instead of a smart bulb. This can be helpful in situations where the fixture is complicated, and installing separate bulbs might not be possible. Obviously, the biggest downside is that the only control you have is to turn the fixture on or off, but this is better than having no control otherwise.
Summary
Smart bulb installation is not always as easy as you'd like it to be, but most common problems have solutions that result in an acceptable setup. When it comes to using multiple smart bulbs in one fixture, we saw how the group integration can be used to treat numerous devices as if they are one. We also talked about some of the physical problems that can be encountered with some fixture designs. While physical issues are harder to resolve, we saw that it is still possible to have smart capabilities with some workarounds.
