The Ultimate No-Neutral Smart Switch Review - Which Is best?
Updated on 22nd Sep 2022 20:34 in General, Review, Smart
We've discussed the problem of using smart switches in circuits that do not have a neutral wire in the past, but the solutions at the time were a bit underwhelming. You either had to put up with drawbacks like minimum load requirements or commit to hiring an electrician to rewire the light switch. While both of these solutions work, the experience is lacklustre when compared with the features of a regular smart switch that does require a neutral wire. In this article, we will be taking a hands-on look at three different products that solve the no-neutral problem, along with a regular smart switch for comparison purposes.
Disclaimer: This post contains affiliate links. As an Amazon Associate, I earn from qualifying purchases. Evvr has also provided review samples for this post.
Warning: This article discusses subjects relating to high voltage mains electricity. Never attempt to work on something you are not familiar with, and always contact a licensed electrician before touching any household wiring.
Table of Contents
The No-Neutral Problem - Why is it so difficult to solve?
We dove into detail about why this issue exists and how it becomes an issue for smart devices in my article
No Neutral Wire? Top 3 Solutions for Smart Lighting, but here's a recap of the vital information.
All electrical systems have two main paths for power, one going in and one coming out. The names we use to describe these power lines vary based on the region and whether we are talking about a Direct Current (DC) circuit or an Alternating Current (AC) circuit. In most places in the world, residential electrical systems use Alternating Current, so that's what we will focus on today. We will also be using the North American electrical standards, but note that the concepts apply everywhere, with the main difference being naming and wiring conventions.
With that in mind, the standard convention dictates that AC circuits contain three main wires: "Hot" or "Live", "Neutral", and "Ground". In practice, the hot wire is responsible for carrying the voltage appliances need to function. In this case, the nominal voltage is around 120V (volts), but this varies by region. Neutral is so-named because it is at a nominal voltage of 0V. It is also the designated return path for the power lines, though, in real life, AC is quite a bit more complicated than "in" and "out" current. These complexities are not too significant so long as we remember that in practice, current flows in both directions in an AC circuit (hence the term alternating current).
The main distinction between hot and neutral is the voltage each line carries. A third wire is also required virtually everywhere: the ground wire. The important thing to remember about the ground wire is that its primary purpose is electrical safety as opposed to something that is actively used regularly. All metal in a standard electrical system is wired directly to ground. The idea is that if a wire were to come loose, break, or otherwise become disconnected, it would touch the grounded metal and have a safe return path. This safety is critical because otherwise, a human can touch a hot wire accidentally, completing the circuit through their body and resulting in a nasty and potentially lethal electrical shock.
Why the smart switch neutral problem exists
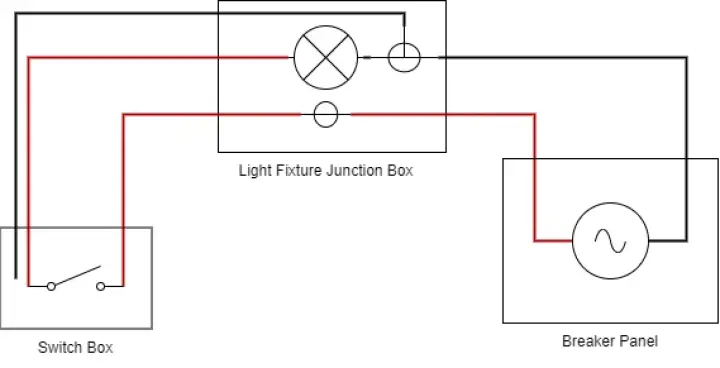
After understanding the basic concepts of an AC electrical system, we can see that a circuit requires, at a minimum, a hot and a neutral wire to function. You might wonder how it's even possible to have a situation without a neutral wire since we just said we need both hot and neutral for a functional circuit. The reason is quite simple: light switches used to be straightforward devices that physically connected or disconnected a wire. This simplicity meant that it was sufficient to run what is effectively a single wire from a light source into a switch, out the switch and back to the light. Figure 1 demonstrates an example circuit where this is the case.
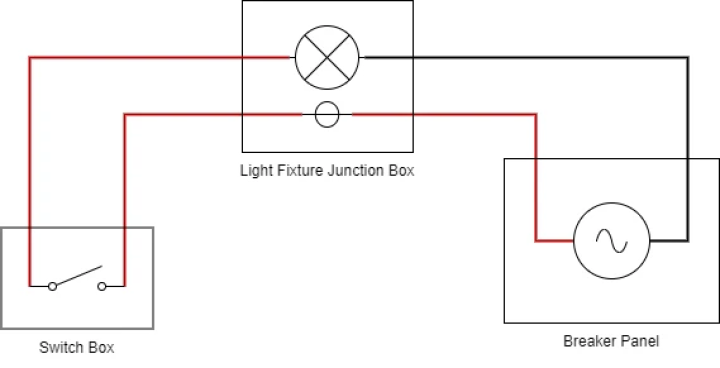
A circuit like the one depicted above used to be common in residential wiring. The reason is that since the switch consumes no power, the only wire that needs to go to the switch box is the one you will be turning on and off. While it is now considered mandatory, some older wiring may even omit the ground wire. This practice saved on costs as we only needed to run a single wire rather than multiple, and since there wasn't a common reason to need power in the switch box, it was a widely accepted method of wiring a light switch.
The problem now arises with modern technology, where people are increasingly interested in using advanced electronics instead of old mechanical switches. The most obvious difference is that these electronic systems require power themselves to function, and with no neutral wire, they cannot obtain that power. A standard solution to this issue is for the device to simply keep the hot wire connected at all times while allowing only a tiny amount of current to flow while the light is supposed to be off. This method worked well enough when everyone used high-power incandescent light bulbs but began to show its flaws when the world switched to LEDs.
LEDs draw a fraction of the current their incandescent counterparts require. As we will see in a bit, the two incandescent bulbs I bought used up to 1A, while the LEDs of equivalent brightness required only 0.247A. While this is great for energy savings, it's terrible news for light switches which rely on the technique of completing the circuit, as in some cases, the power required by the switch becomes enough to light the LEDs. Bulb manufacturers have made some changes to limit this effect, but it really comes down to the brand and model of the bulb, which makes things a lot more complicated than they should be.
What does electrical code require in the modern day?
Most regions have either already or are in the process of making the circuit shown in Figure 1 illegal. The motivation is clear: devices should have a safe and effective way of drawing power in the switch box. Figure 2 below is an example of a modern version of the light switch circuit. It's important to note that usually, the requirement is just to have a neutral wire available in the switch box - there are several ways you can do this. We won't discuss every possible combination, but this is a general idea of what it might look like.
In such a configuration, the neutral wire will be in the switch box, though it is common for it to be tucked away with a wire nut on the end, as most houses have mechanical switches pre-installed. In this situation, upgrading to a smart switch is trivial because the neutral wire is present, and none of the previously mentioned issues apply.
The products under review
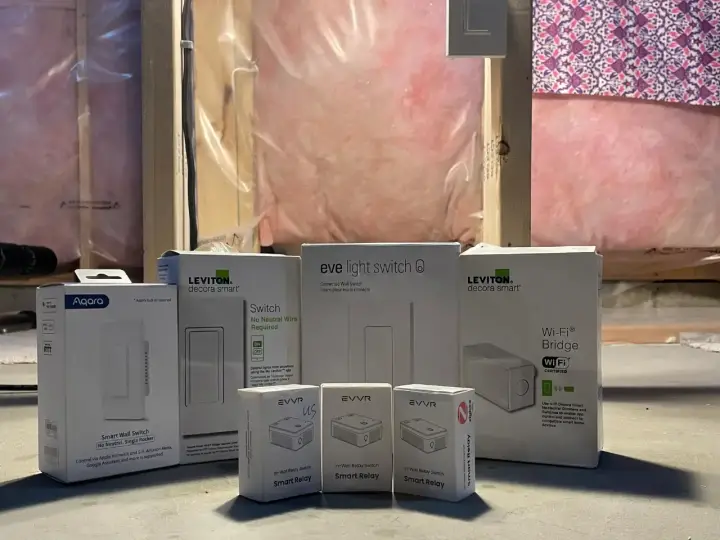
Let's look at the products we will review in this article. As promised, three different products work without a neutral wire and one that will act as a point of comparison representing the devices that do contain a neutral wire. They are all smart switches, except for one smart relay that we will get into first.
Evvr No Neutral Smart Relay
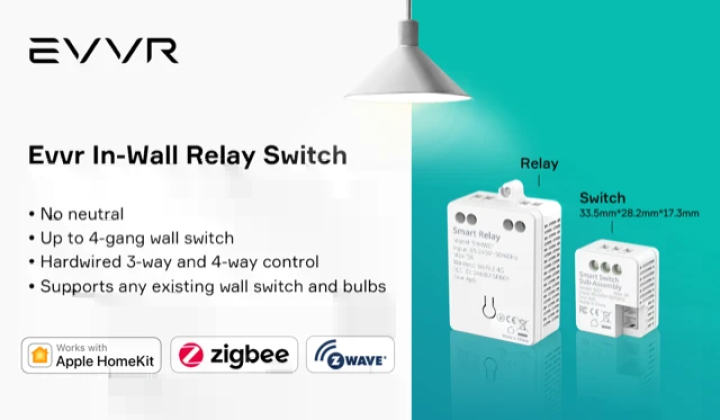
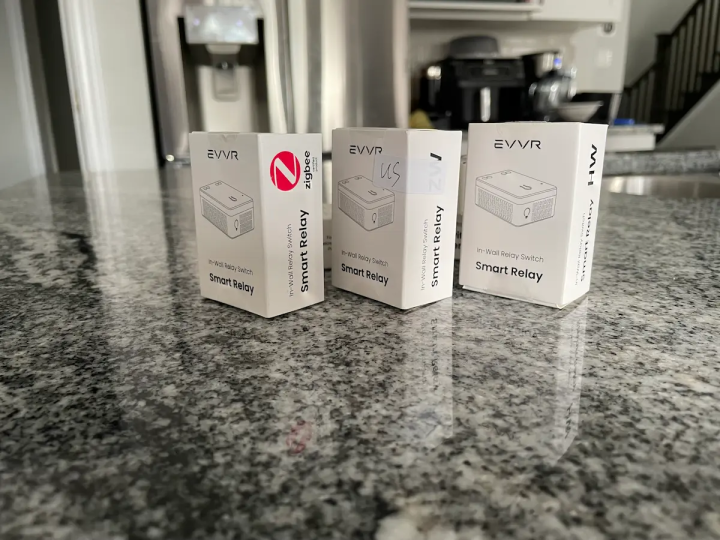
The Evvr In-Wall Relay Switch takes a unique approach to resolving the common no-neutral wire problem. Instead of running a small current through the light, the Evvr manages to disconnect it from the circuit completely. It achieves this feat by effectively replacing the light in the circuit, thus powering itself directly. To power the light, the relay has a switched connection that goes to the light - once the command is received, the relay will complete the circuit, causing the light to turn on.
Since this device requires constant power, the light switch cannot simply disconnect the power, as that would effectively disable the relay. Evvr's solution is clever and requires a small module that sits in the switch box and permanently keeps the circuit connected. The switch module then has an input that connects it to a regular mechanical switch. When the physical switch is toggled, the module sends a signal over the wire to the relay indicating the change, and the relay toggles on or off.
Check out the Evvr in-wall relay switch at the Evvr store here!
Aqara No Neutral Smart Light Switch
The Aqara No Neutral Smart Light Switch is a Zigbee device that acts as a drop-in replacement for your existing light switch. Using the Aqara Hub, it is possible to control it using HomeKit, Google Home, and Alexa. You don't even need the hub if you have another device that can act as a Zigbee hub, like an Amazon Echo Hub or a Zigbee USB stick. It works by drawing small amounts of current through the light, but not enough to turn it on. As an all-in-one solution, all you have to do is wire it in, and you are ready to go!
Check out the Aqara No Neutral Smart Light Switch on Amazon here!
Leviton DN15S Decora Smart No-Neutral Switch
The Leviton no-neutral smart switch is another drop-in replacement for your existing light switch. What makes this unit different is the unique decision to require a special external hub which enables its communication with HomeKit, Alexa, Google Home, etc. You might say that plenty of devices need a hub, but this one is unique because the "hub" is just a tiny (1.42 x 2.04 x 1.14 inches) device that plugs directly into a nearby outlet. This unique method allows the switch to use low-power Radio Frequency (RF) technology to talk to the companion device, which then passes the message along using WiFi.
For those unaware, WiFi uses a significant amount of power while connected. As a result, most devices like smartphones turn off the WiFi transceiver every so often to preserve battery life. Since a no-neutral smart switch is forced to draw current from the same circuit as the light it is trying to control, it is not practical to use such a power-intensive technology. As a result, the companion bridge is a low-cost solution to an otherwise tricky problem. Some of the other products in this review get around this problem by using a hub - the difference is that they usually require a full-fledged hub which costs much more than the Leviton bridge.

Check out the Leviton DN15S on Amazon here! Also, don't forget to grab a Leviton MLWSB bridge on Amazon here!
Eve Smart Light Switch
The Eve Smart Light Switch will represent the standard smart switch product that does require a neutral wire. While you can not use it without a neutral wire, the Eve smart switch has some nice features. It supports HomeKit right out of the box and can be set up easily just by scanning the HomeKit code on the box. Note that this switch is the only one in this review that supports only one ecosystem. It is possible to use HomeKit bridges with something like Home Assistant to integrate other technology like Alexa or Google Home, but doing this is much more advanced and is not really the intended use.
Check out the Eve Smart Light Switch on Amazon here!
The test setup
Since making constant modifications to the actual wiring of my house would be highly time-consuming and challenging, I have instead decided to design a test bench that will serve as a model of your actual in-wall wiring. As it is only relevant for the purpose of this review, I won't be going into too much detail about how I built it. However, to better understand the test and my results, we will briefly review the setup I used to try each smart switch.
Designing the test bench
I wanted to keep things simple, but all while staying true to the real-world conditions you would expect to find in a house built legally in Canada. This restriction entails complying with the electrical code, which is not always the easiest to understand unless you are a licensed electrician. I started by drawing up some ideas, including where the light fixture and switch box would go, along with where I would route the wires to be as realistic as possible. After several hours of messing around in Fusion 360, I ended up with what is shown in Figure 3.
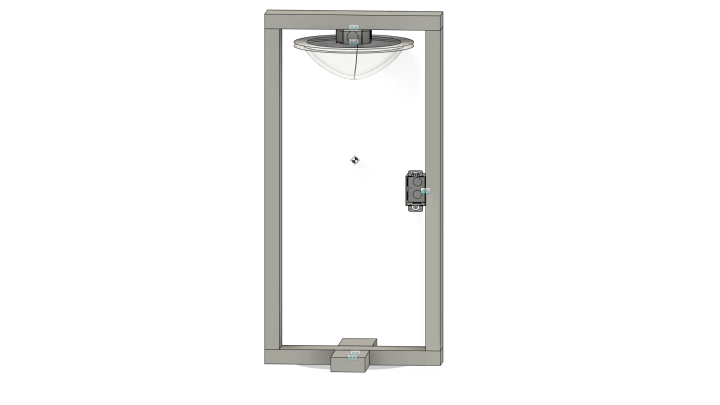
The idea was pretty basic, but it was essential to check that the design was stable and wouldn't topple over. Stability is especially important when you consider that the wires onboard will carry mains level voltage, which could easily give you a nasty shock. Due to this safety concern, I must caution against building something like this yourself! Unless you are familiar with electrical work, it's best to leave potentially dangerous work like this to a qualified electrician.
Building the test bench
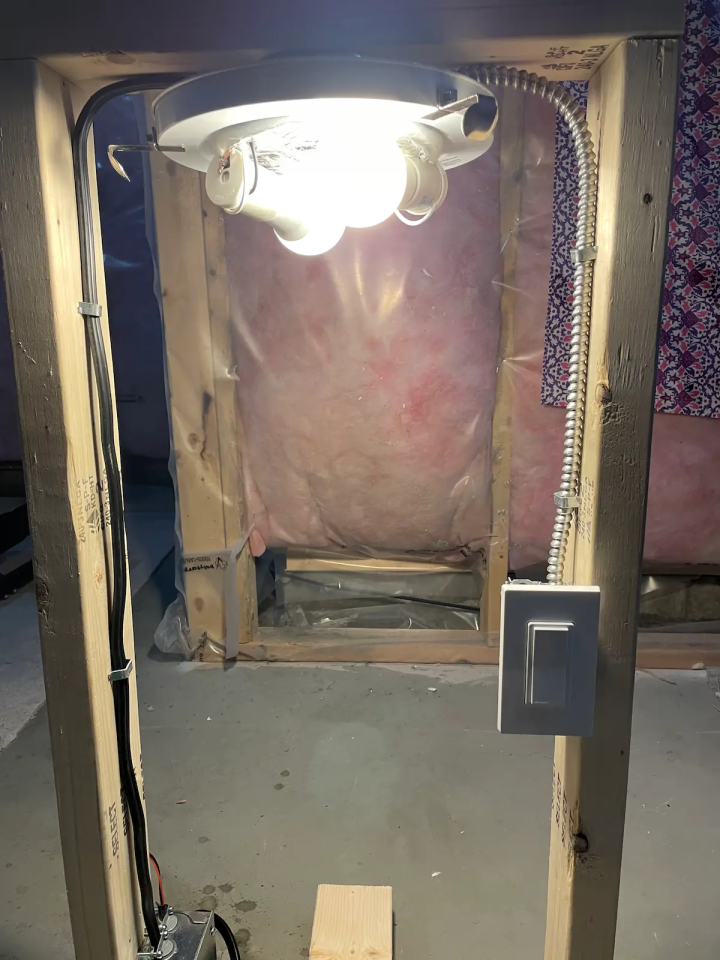
Once I had the design, I went to the store and bought various materials. The structure would just be built out of standard 2x4 wood, but the electrical supplies were where things got more interesting. It was important that the test bench would be able to clearly demonstrate the wiring used when there is and when there isn't a neutral wire in the switch box. To get this result, I bought two different kinds of wire and various standard electrical supplies. The most important components are the light fixture, the three electrical boxes, and the wire.
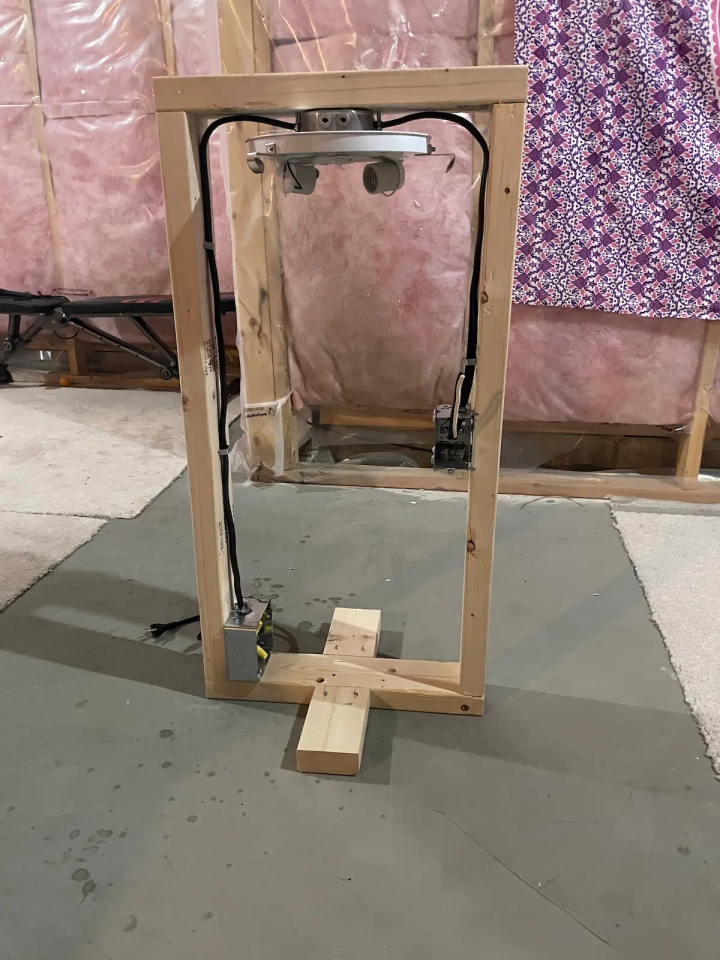
The first configuration was a replica of what most no-neutral wiring looks like behind the walls. In this configuration, we have the power wires coming up the side of the wall into the fixture, with a single two conductor wire going out the other side and entering the switch box. The circuit diagram representing this configuration is shown in Figure 1. Usually, the white wire (traditionally used for neutral) will have black electrical tape wrapped around it to indicate that it is a switched hot wire.
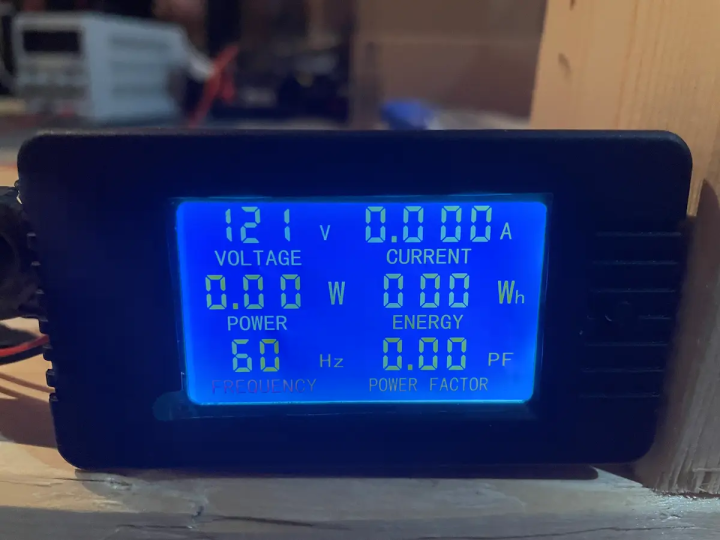
The junction box on the bottom left of the unit is where the main test bench power lines are connected to a standard outlet plug, giving us mains power for our testing. While wiring everything up, I realized that it would be beneficial to be able to monitor some parameters about power consumption, such as current, voltage, and wattage. To accomplish this, I used a current measuring clamp meant to be installed and mounted near machinery that you want to monitor. It is powered from the mains AC voltage, making integrating it into the test bench easy.
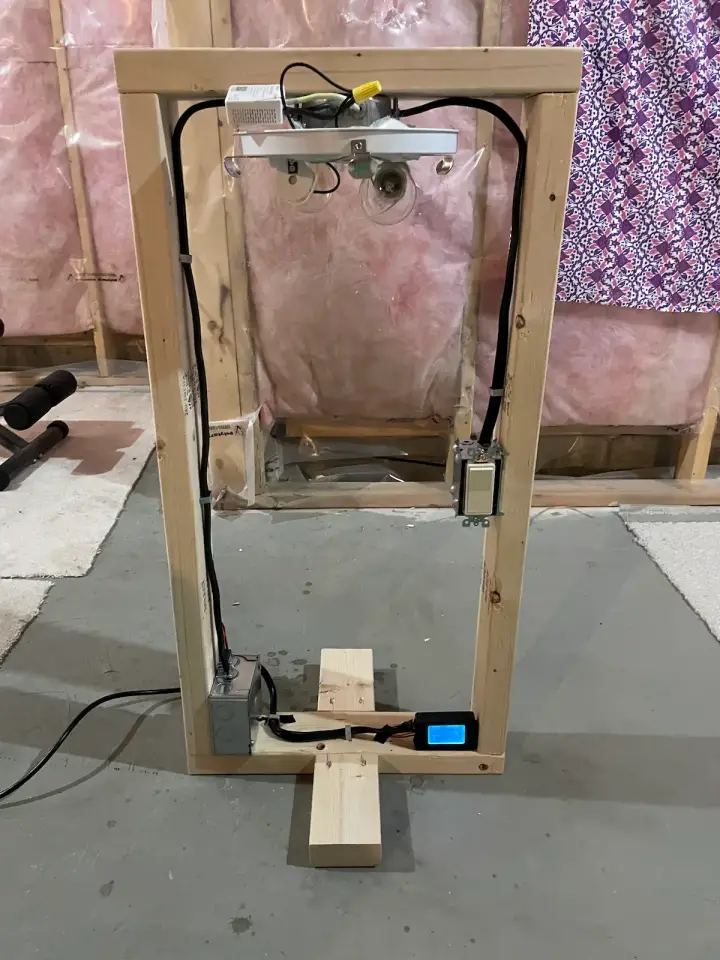
The little screen in the bottom right corner gives us measurements reflecting the current draw, the voltage, and the power consumption of anything connected outside the bottom left junction box. The ability to measure power will become important later when we discuss each product in detail.
Building the modern wiring test bench
Once everything was ready, and the no-neutral version of the test bench was built, it was time to move on to the modern equivalent of the same wiring. As we mentioned earlier, the wiring that does not include a neutral wire in the switch box is no longer legal in most jurisdictions. For this reason, we will also wire the bench in this modern configuration to demonstrate the differences and allow us to test the Eve switch, which requires a neutral wire. The change is quite simple on the test bench since the wiring is all exposed. However, it isn't difficult to imagine how performing the same task on wiring behind the wall is significantly more challenging.
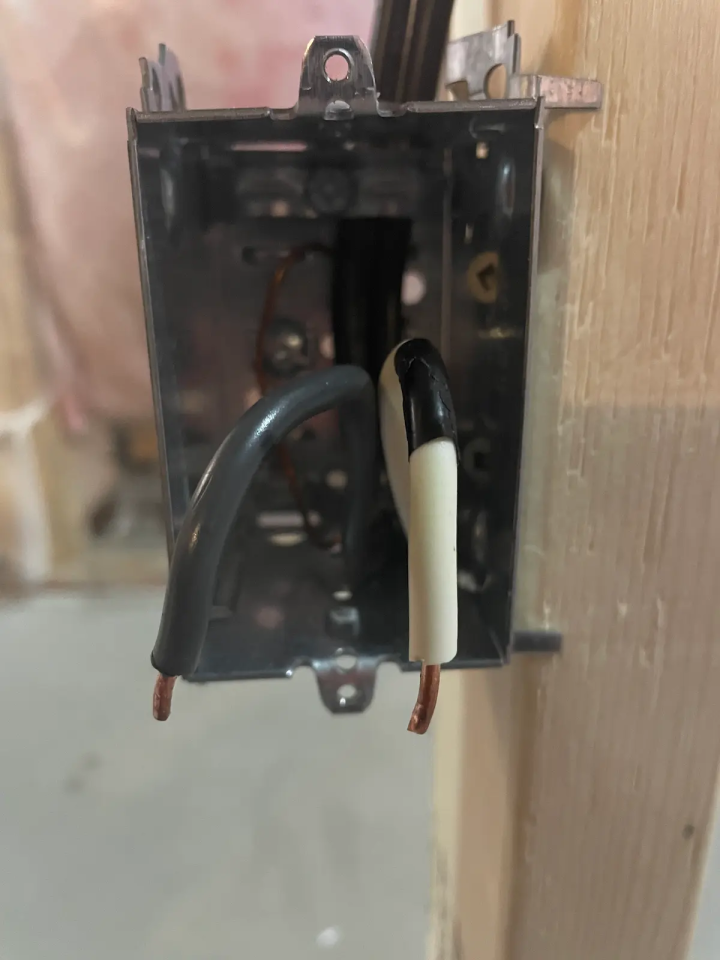
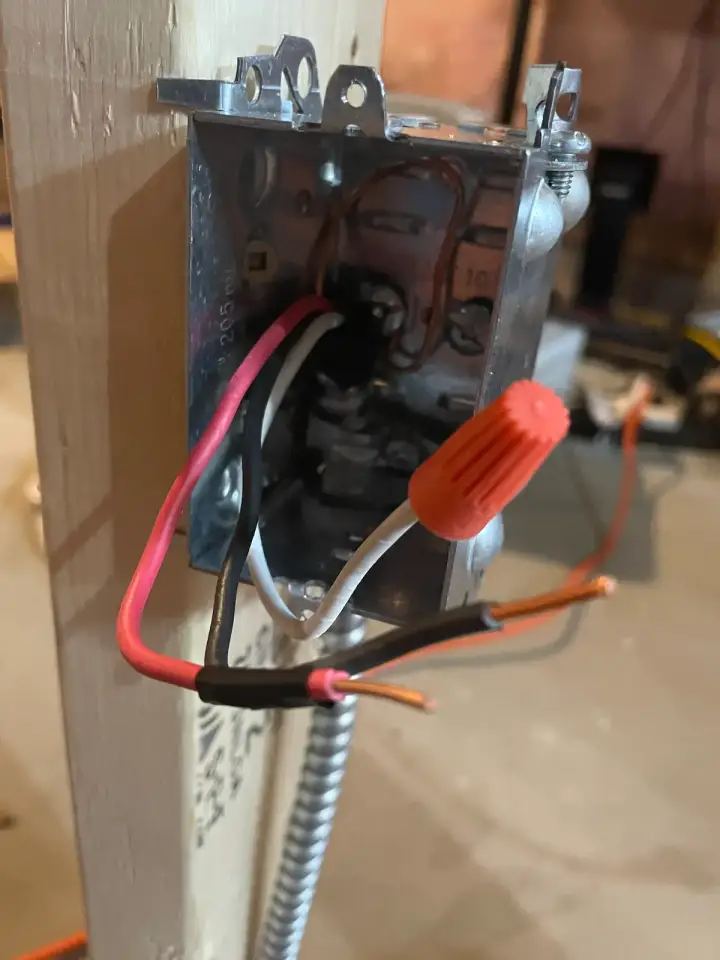
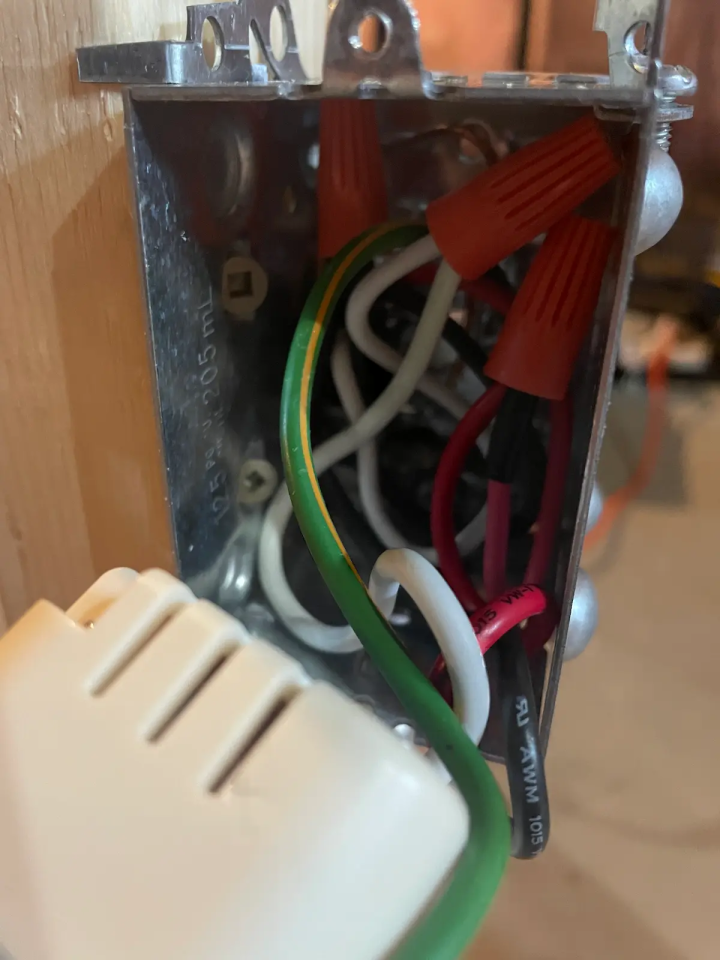
The store only had metal sheathed cable for whatever reason, but it got the job done. In practice, the wire would probably use plastic sheathing, but for testing, it should not make any difference. Figure 6 shows the wiring you can expect to find when a circuit has been wired using the old no-neutral approach. You can see that there are only two wires in the box, in addition to the ground wire, which is always connected to the metal box. It might be tempting to use the ground wire as the neutral since it's already there, but I must emphasize: never do this! You must always connect the ground wire to ground for safety!
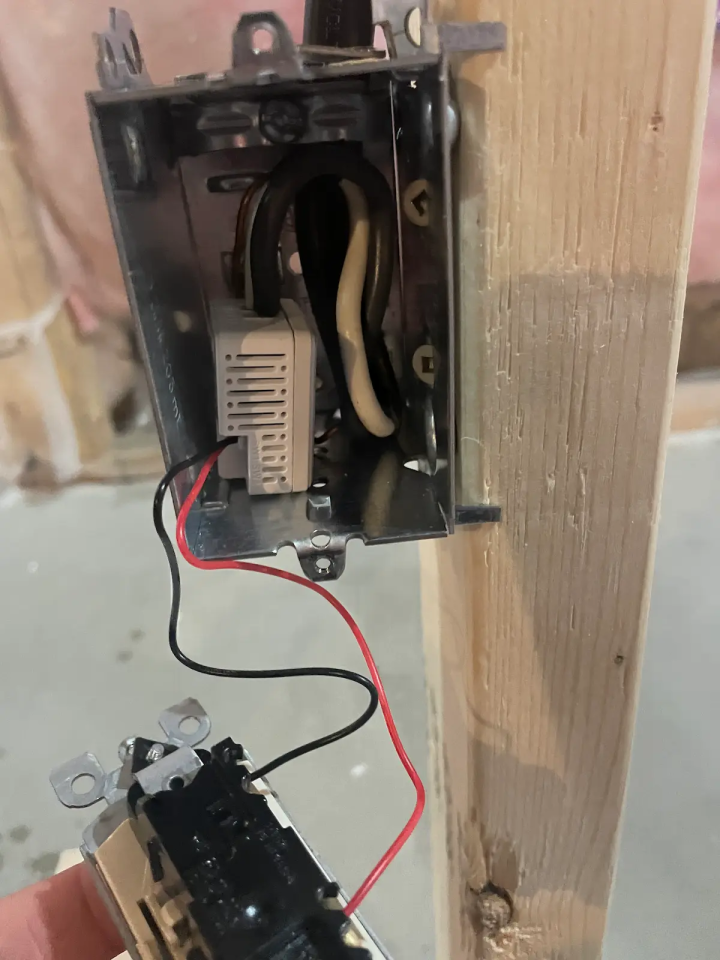
In figure 7, we can see the typical arrangement for wiring that includes a neutral wire. It's important to understand that there are two standard methods of wiring a light switch with neutral - one, as shown here, and one where the power first goes into the switch box, then on to the fixture. The advantage of going into the switch box first is that we avoid needing a three conductor wire, as we can simply interrupt the power downstream from the switch while maintaining power in the switch box. The main reason I am using this particular setup is to make things simple when converting from the no-neutral configuration. Wiring everything through the switch box involves a lot more work than changing the existing wire, in my case, so that's the method that made the most sense.
Testing methodology
We won't be able to test everything as it will take far too long. Instead, I've chosen a few configurations likely to be what your average home contains. Specifically, we will be testing each switch with three different types of bulbs:
- Incandescent - your average dollar store light bulb
- Philips LED bulb - a high-quality LED bulb meant to replace a 40W traditional bulb
- Cheap LED bulb - a dollar store LED bulb meant to replace a 100W traditional bulb
Each of these bulbs will be useful for varying reasons. A common problem with no-neutral smart devices is that they use small amounts of power at all times just to function. As a result, some cheaper LED bulbs are known to turn on while they are supposed to be off. As such, it's good to check that your average dollar store bulb works with each of these products. The incandescent bulbs will help us test high power loads, as they consume significantly more power than their LED counterparts. Finally, the high-quality bulb is going to act as our control.
We won't be able to test fluorescent lighting or other types of lighting, but generally, most people use one of the solutions we are testing at home.
Product Ratings
We will use a few standard categories to give everything a friendly rating. I chose these because they generally represent the overall experience for an end user of these products. Note that you may have a different experience depending on factors such as your existing wiring, ecosystem, and knowledge of smart technology.
The categories we will use are as follows:
- Ease of installation (0-10) -> How difficult is it to install? Are the instructions clear?
- Ease of use (0-10) -> How much effort is required to pair it? Does it require you to sign up for an app?
- Reliability (0-10) -> Does it "just work"? Are there any situations where it performs poorly?
- Power consumption (0-10) -> How much power does it use, especially when in the off state?
- Compatibility (0-10) -> Does it work with different bulb types? Do cheaper bulbs cause any issues?
Each product will receive a score for each category. The ratings will be determined with a focus on comparison, such that the lowest scoring product will have the worst performance in the group. Although this scheme means the ratings should not be considered absolute, even the worst performer may still be an excellent product!
Testing each product
After much setup, we are now ready to test each product. The test involved wiring each switch, pairing it to the correct ecosystem, and trying it both with the physical switch and using the smart functionality.
Aqara No-Neutral Smart Switch
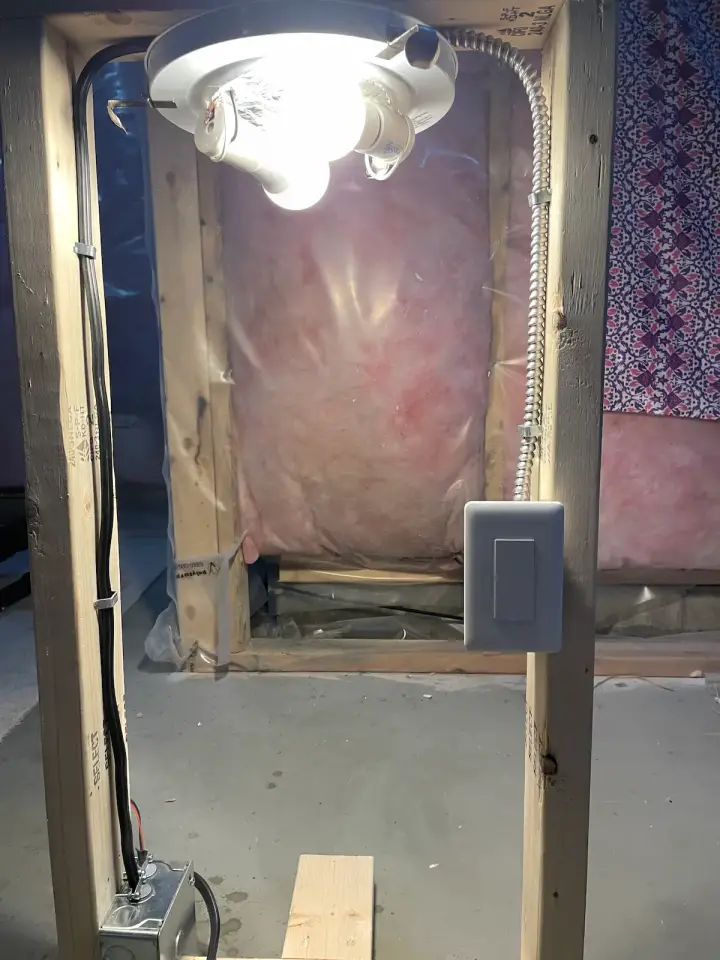
Installation
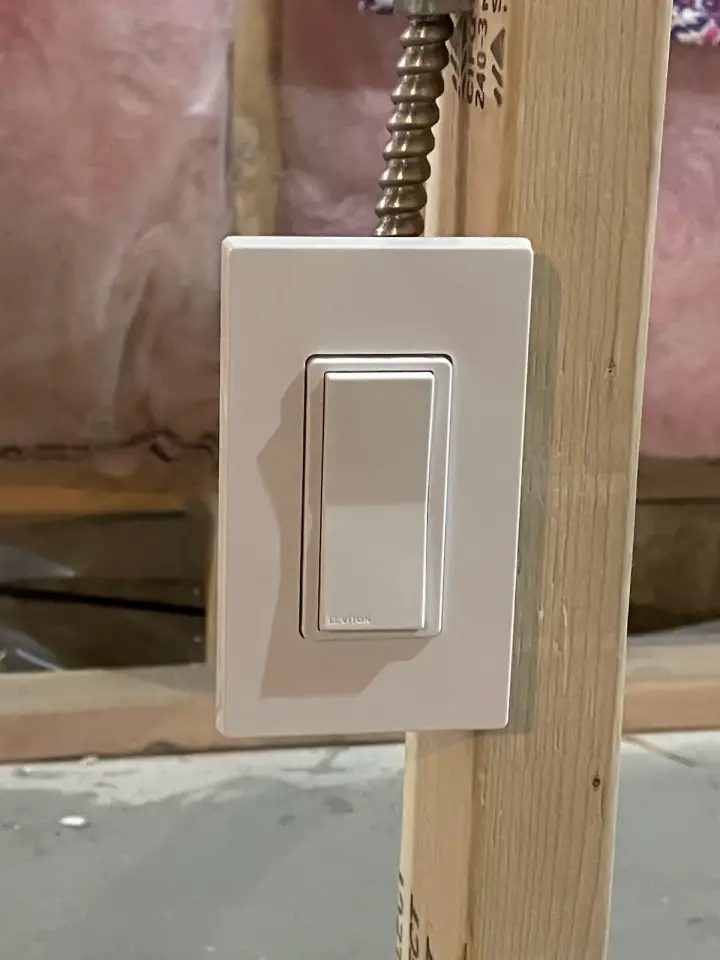
The Aqara comes in a box with the switch, a matching faceplate, some wire nuts, and an instruction manual. The instructions were straightforward and explained clearly what to do and how to do it. The switch had three wires coming out of the back, one green for ground, one black for hot, and one red for the switched output to the light. After connecting each wire to the matching wire in the switch box, I ensured everything was secure with wire nuts. Next, I used the included screws to fasten the switch into the box. I then used two more screws to attach the faceplate holder to the switch body. Finally, I pushed the faceplate onto the holder until I heard it click.
Pairing the device
Once I plugged everything in, the switch came to life and was in pairing mode. The box came with a scannable Zigbee code which allows you to simply scan and get started if you are using a supported hub. Using the Aqara hub, this process is advertised to be as simple as scanning the code, and everything else is done automatically. Unfortunately, since I'm using Home Assistant with a Zigbee USB stick as my hub, this functionality was not supported. However, the steps for pairing it were still impressively simple - all I had to do was click a button in my hub to discover new devices, and it was automatically detected. Once I accepted it into the network, the job was done, and it could be controlled from my smart home.
Power consumption
The switch used no measurable power while off. It should be noted that the switch is probably not using "zero" power but instead using so little that my instruments cannot measure it correctly. This is still impressive as the meter will go down to the 1mA range, which is a tiny amount of current. We can safely say that this product gets a 10 for power consumption.
Usage
The reliability was good overall. Once connected to my Zigbee network, the switch could be controlled from Home Assistant without any fuss. I was also impressed with the switch's responsiveness. As soon as I toggled the state in the app, the fixture turned on or off virtually instantly. The delay was so slight you would not be able to tell without some measurement device. Unfortunately, it seems the update functionality is less reliable. When activating the switch manually, there were times when the update would take a long time to come through. It's difficult to tell if this is an issue with Zigbee or a problem with the device. In any case, some points will be lost due to the delayed and sometimes glitchy status update. Note that this was only a problem when manually activating the switch - using it remotely always worked well.
Compatibility
The Aqara did decently well with the different bulbs I tested. Generally, they all worked reasonably well, except for the cheap dollar-store LED bulb. However, for some reason, it would sometimes "turn off" in a way that would result in a dimly lit bulb rather than turning off completely. In addition, in some tests, the bulb would flash a bit before turning off. The exact reason this happens could depend on many factors, ranging from how the smart switch controls the load to the bulb's electrical circuit. In any case, the switch worked well with incandescent bulbs and the premium Philips LED bulb. As a result, if you experience any strange behaviour from this product, I recommend trying a different bulb.
Aqara - Overall Results
Ease of installation: 10/10
Ease of use: 9/10
Reliability: 6/10
Power Consumption: 10/10
Compatibility: 7/10
| Bulb Type | Supported By Switch | Works Well? |
|---|---|---|
| Incandescent | Yes ✔️ | Yes ✔️ |
| Philips LED bulb | Yes ✔️ | Yes ✔️ |
| Cheap LED bulb | Yes ✔️ | No ❌ |
Overall conclusion: The Aqara smart switch is an excellent all-around option for a drop-in replacement of a no-neutral switch. You should certainly consider this smart switch in situations where Zigbee is an option. Its response time is lightning-fast to remote commands, a nice change from cloud devices that can take a comparatively long time. The biggest downside is that it seems to struggle with cheaper LED bulbs and sometimes doesn't update correctly after manually operating the switch.
Sound interesting? Check out the Aqara No Neutral Smart Light Switch on Amazon here!
Leviton DN15S No-Neutral Smart Switch
Installation
The Leviton DN15S came in a box with the switch, a matching faceplate, some wire nuts, and an instruction manual. The instructions were good overall and explained the installation process in detail. In much the same way as the Aqara, the Leviton switch has three wires coming out the back of the unit - green for ground, black for hot, and red for the light fixture. After connecting everything, I used the included screws to mount the switch inside the box. Next, I mounted the included Decora faceplate, and the installation was done!
As mentioned earlier, the Leviton requires a companion bridge device before you can use any smart functionality. Installing the bridge is exceptionally straightforward as it is literally plug-and-play. Simply taking it out of the box and plugging it into a nearby outlet was all that was required to get it working. However, the bridge must be paired to your WiFi network before you can control the switch from a smart home. This step was a bit more annoying as it required the "My Leviton" app. The app is decent, but it forces you to make an account before you can do anything else.
Pairing the device
Once the app is installed, and you have an account made, the pairing process is as simple as following the on-screen instructions. It quickly found the light switch and made it available to my HomeKit controller. One crucial detail is that the bridge needs to be added to HomeKit separately from the initial setup process. While it would be nice to avoid this extra step, it isn't that big of a deal, as connecting the bridge to HomeKit was a trivial task that involved pressing a few buttons in the Home app.
Power consumption
The switch used no measurable power while off. This low power usage was expected after seeing the Aqara do the same right before - but the Leviton also has a companion bridge that uses power separately. After testing the switch under different conditions, I found that the bridge also uses a tiny amount of energy during regular operation. The resolution of the meter used to measure the bridge goes down to around 1mA, but it may use power in such small bursts that it isn't possible to get a good reading. As a result, the Leviton receives a 10/10 for power consumption.
Usage
The impressively low power usage might not come for free, as it appears this product has some reliability concerns. For the most part, the smart functionality works decently well, although it does have a sometimes significant delay. Sometimes, the switch responded around 10 seconds after toggling the state from the My Leviton app. When using HomeKit, the experience is similar. Generally, it works pretty well, though there were several instances where it would just randomly appear as offline. In addition, as both WiFi and a bridge are involved, it's difficult to pinpoint where exactly things might be going wrong.
Compatibility
The Leviton did not show any signs of problems when tested with all three bulb types I had available. There were also no strange flashes or flickers with the cheaper bulb. As a result, it receives 10/10 for compatibility - nothing wrong here!
Leviton - Overall Results
Ease of installation: 9/10
Ease of use: 6/10
Reliability: 6/10
Power Consumption: 10/10
Compatibility: 10/10
| Bulb Type | Supported By Switch | Works Well? |
|---|---|---|
| Incandescent | Yes ✔️ | Yes ✔️ |
| Philips LED bulb | Yes ✔️ | Yes ✔️ |
| Cheap LED bulb | Yes ✔️ | Yes ✔️ |
Overall conclusion: The Leviton provides a good way of adding WiFi control to a switch box without a neutral wire. Unfortunately, it has a few reliability issues and requires the installation of an app that requires you to create an account before anything works.
Sound interesting? Check out the Leviton DN15S on Amazon here! Don't forget to grab a Leviton MLWSB bridge on Amazon here too!
Evvr No-Neutral Smart Relay - HomeKit, Zigbee, and Z-Wave
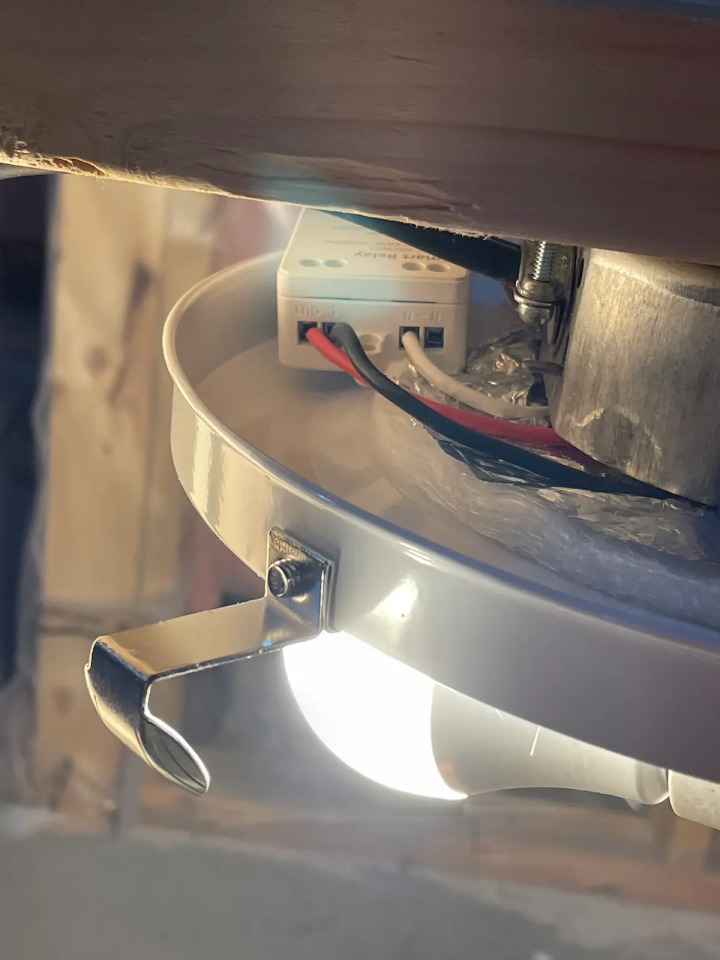
The Evvr Smart Relay is a unique product because, unlike everything else in this review, it is not intended to drop into the switch box as a replacement for your existing switch. Instead, you can use the smart relay without a switch in the box at all, as it is intended to sit next to the light fixture! However, despite the initial appearance, it does count as a solution for a no-neutral smart switch thanks to the switch module, which is designed to connect to any standard light switch. The switch module then connects to the live and load wires in place of the original switch. The module essentially keeps the circuit closed such that the smart relay always has power, thus negating the no-neutral problem entirely!
You may be wondering how the switch could have any effect if the module simply keeps the circuit connected at all times, but this is where the Evvr smart relay shines. The module detects the state of the attached switch and sends this information to the relay using the power wires. As a result, any mechanical light switch can control the light without interrupting the power to the smart components! Figure 8 illustrates what this looks like in practice if all of this is difficult to imagine!
Installation
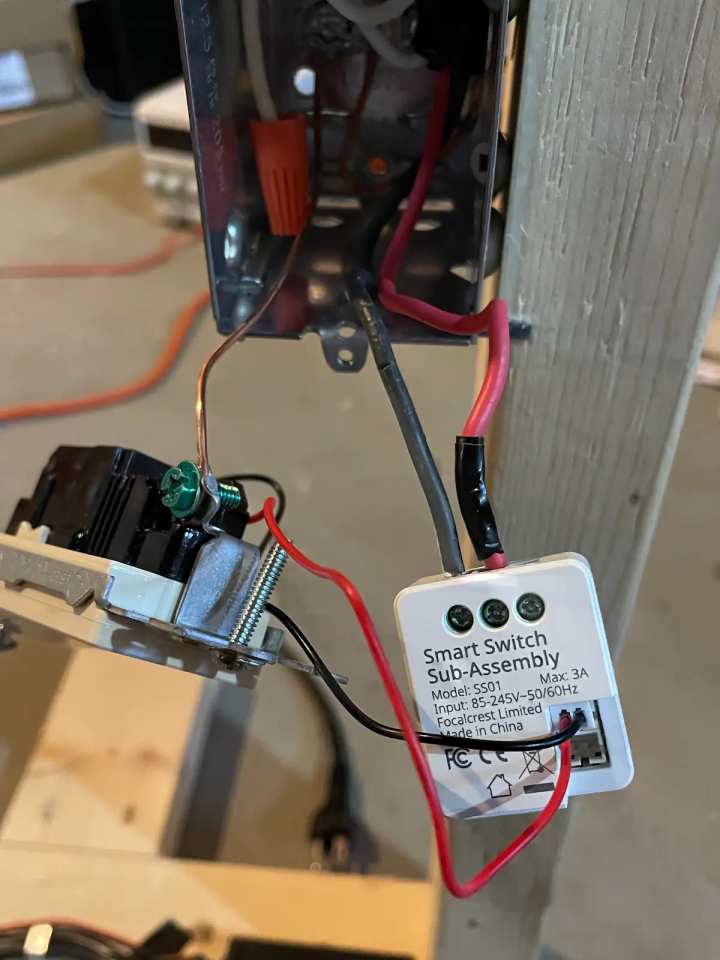
The standard kit comes with the smart relay and the smart switch sub-assembly module, which are all you need to get started. As the relay uses your existing light switch, you won't have to worry about matching the styling or finding a compatible switch! It will work with both momentary and toggle switches, though I couldn't test the momentary switch functionality as they are pretty rare in North America. The instructions were clear and to the point, though I would like to see instructions for the overall setup of this configuration rather than separate instructions for the relay and the switch sub-assembly. If you plan to install this, remember that you must follow the switch sub-assembly instructions and not the one for the relay.
The first step was to remove the light fixture (making sure the breaker was off first, of course) and rewire it, so that neutral and live were connected to the relay. There is a spot for a third wire connecting to the light itself. An important note at this step is that the live wire must come from the switch box if you want to use the switch sub-assembly. The diagram in the instructions is quite good, but it is an easy mistake to make - I messed this up a few times while testing. There are also two wiring options to choose from: you can either connect the light directly to neutral or connect the light to the second neutral terminal on the relay. In the latter configuration, the light will only be connected to the relay.
Wiring the switch was the easiest part: all I had to do was disconnect the two wires going to the switch, move them to the appropriate terminal on the module, and connect the included wire to the existing switch. The most challenging part of this process was trying to get everything to fit inside the junction box, though it didn't take too long with some clever positioning. Once I screwed the original switch back in, that was it for the installation!
My only complaint at this stage is that the screw terminals are a bit difficult to work with, depending on the gauge of your wire. It will work with most wiring configurations, but it's something to keep an eye on if you have thicker wires. I noticed that it was possible to pull the cables out of the terminals with some minimal force depending on how well they were inserted and clamped down. You will want to ensure the connections are secure, as loose wires could cause a fire or cause injury.
Remember that you should place the relay near the light fixture itself, which involves finding a suitable location nearby without creating any fire or shock hazards. Make sure you consult your local electrical code before installing the relay in a given spot, as there might be restrictions on where you can install such equipment. Some light fixtures will have convenient areas inside them, but others offer a much tighter squeeze. The fixture I used for testing is an excellent example of such a tight squeeze. Therefore, it is worth considering whether there will be room to mount the relay properly.
Pairing the device
The pairing process depends on which version of the smart relay you are using, but they are all relatively easy to perform. In the case of the HomeKit model, it was as simple as scanning the pairing code within the Home app. The Zigbee and Z-Wave models can also be paired using the standard procedure for those ecosystems. As such, getting the smart relay paired with your smart home is pain-free and took me less than 5 minutes.
Power consumption
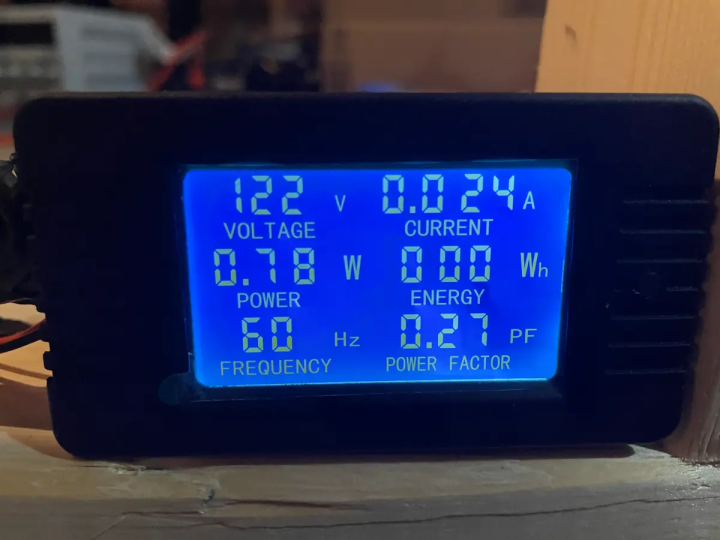
In terms of power consumption, the results vary by model. Specifically, the Zigbee and Z-Wave versions used no measurable power when off, while the HomeKit version used a consistent 24mA. It's important to note that this relatively small amount of energy will likely not be worth talking about. In my case, this extra constant use would result in around 1$ extra on my yearly electricity bill. While the reason for this additional power consumption could realistically be caused by anything, it seems that this might be a compromise to enable better response times. Compared to the other HomeKit products in this review, the Evvr relay was much more responsive and had virtually no lag between sending a command and the light changing state.
Usage
In terms of use, the only confusing aspect relates to the mechanical light switch, which has no way of updating its physical position to match the digital state. Despite this limitation, you only need to toggle the button twice to get it back into sync. For those using momentary switches, this will not be a problem at all! I did not find the switch going in and out of sync with the smart hub to be a hindrance, but this may be an important consideration for some.
Reliability is a strong point of the Evvr smart relay. The relay always updated its state nearly instantly when I manually toggled the switch, and it also responded within 1-2 seconds when controlling it remotely. Despite my best attempt, I could not confuse it by sending many on/off commands in quick succession. Overall, I was impressed with the reliability of this product! Please note that it is possible to accidentally set the unit into momentary switch mode when pressing the switch repeatedly. After one test, I noticed some strange behaviour, though I resolved it after following the instructions for placing the device into toggle switch mode.
Compatibility
As a side effect of the Evvr's unique wiring design, the product's compatibility is much better than most no-neutral solutions available today. There is no good reason for it to struggle with any normal resistive load (such as lighting) as the relay uses power without drawing any through the load. This expectation reflects reality, as the Evvr had no issue handling any of the three bulb types I tested with it. While I couldn't try everything, I would expect this to carry over to other lighting types. As such, if you aren't sure that your light will work with no-neutral smart switches because it is less common, the Evvr relay is a good bet. From my testing, it gets 10/10 for compatibility.
Evvr Smart Relay - Overall Results
Ease of installation: 8/10
Ease of use: 10/10
Reliability: 9/10
Power Consumption: 10/10 (Z-Wave & Zigbee), 9/10 (HomeKit)
Compatibility: 10/10
| Bulb Type | Supported By Switch | Works Well? |
|---|---|---|
| Incandescent | Yes ✔️ | Yes ✔️ |
| Philips LED bulb | Yes ✔️ | Yes ✔️ |
| Cheap LED bulb | Yes ✔️ | Yes ✔️ |
Overall conclusion: The Evvr Smart Relay is a genius solution to a classic problem. Allowing the use of existing switches is a nice benefit that makes maintaining the style of your home much more manageable, in addition to being cheaper to replace. The relay is responsive, reliable, and works well with all the light bulb types I tested. As the relay is powered directly, there is no minimum load requirement which makes this great for LED applications. The only practical downside is the possibility of the mechanical switch going out of sync with the state of the light, though this may not be a concern for you.
Sound interesting? Check out the Evvr in-wall relay switch at the Evvr store here!
Comparison with Eve Neutral-Required Smart Switch
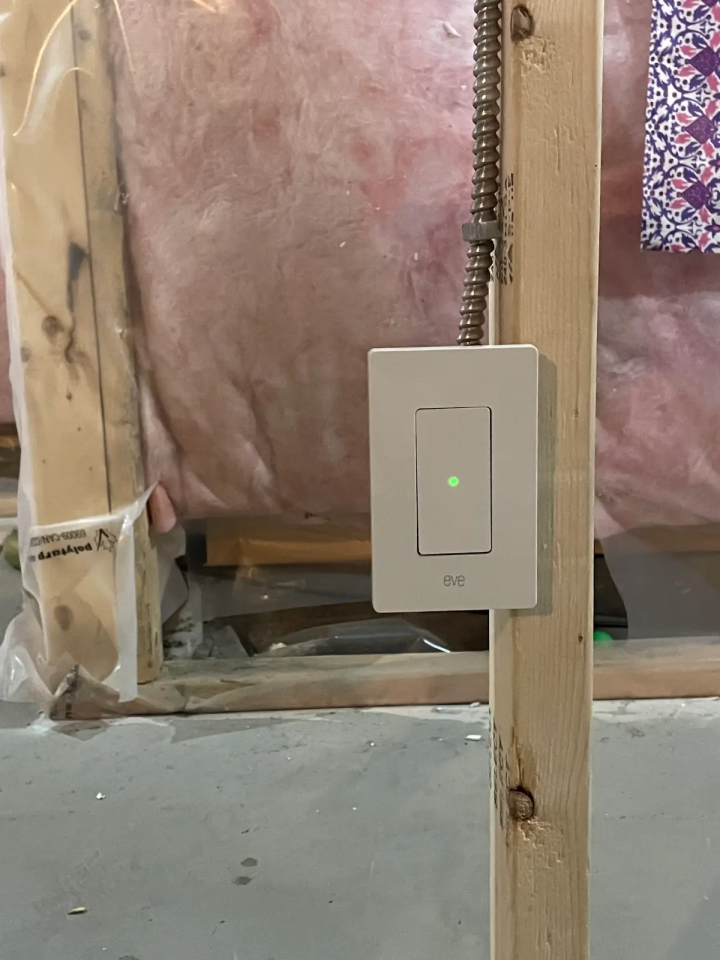
The Eve HomeKit Smart Switch requires a neutral wire but provides some good comparison points for our no-neutral products. As with the other switch-style devices, the installation was straightforward. It worked as a drop-in replacement for an existing switch, with the added caveat that you need a neutral wire in the switch box for any of it to work. Again, as with the other HomeKit products, the pairing process was simple and used only the Home app and the pairing code. After that, it was ready to go, and it worked right off the bat.
The most valuable detail from testing the Eve smart switch was that it surprisingly did not use any measurable power while the light was off. This low power usage was surprising because no-neutral smart switches need to keep their power consumption low so that they do not turn on the light while they are supposed to be off, but this switch has access to a neutral wire. While low power use is generally a good thing, WiFi communication requires a decent amount of power, and as such, we can conclude that this unit is entering some low-power mode. As a result, this power saving impacts response times and reliability, as the device will not be immediately notified when a command comes through.
The HomeKit power consumption finding provides insight into what might be happening with the no-neutral HomeKit products. For example, while the Evvr smart relay responded virtually instantly both to manual changes on the switch and remote commands, the other devices had (sometimes significant) lag. So if you are interested in a low latency HomeKit smart switch, the Evvr HomeKit relay might be a good option.
Conclusion
So that was a lot of information! However, after trying all these different products, I was pleasantly surprised to find that many products are now available to address the no-neutral smart switch market decently. With the availability of products for three of the most significant smart ecosystems, there are plenty of good choices. In addition, this review has at least two completely different types of no-neutral smart switch systems. The results of my testing show that the choice of which is the best option for you will depend on several factors.
Notably, the Evvr smart relay provides an exciting method of working around the main problem with no-neutral light switch wiring. By turning the switch into a digital on/off signal, the relay can use as much power as it needs for its own use without impacting the light fixture. This method allows for much more flexibility than most drop-in replacement smart switches, as they almost always have a minimum load requirement. While the maximum relay specifications must still be respected, replacing any switch with a relay is technically possible, as it is effectively just an electromagnetic switch.
While some of the all-in-one smart switches had issues with certain types of bulbs, the relay worked perfectly with all of them. It's also possible to use different loads with relays, though the manufacturer only claims to support incandescent, halogen, LED, and fluorescent lights. In practice, as long as you respect the relay's ratings, it should work fine. Unfortunately, the extra flexibility and excellent benefits are only held back by the limitation of mechanical toggle switches, which can become out of sync with the digital state of the switch. There is, however, an easy solution: using a momentary switch. This way, the state is always toggled by pressing the button.


