How to Install Home Assistant on the Raspberry Pi Zero Super Easily
Updated on 3rd Sep 2020 19:19 in Home Assistant, Tutorial
Home Assistant is really nifty software that allows anyone to create what is essentially a DIY smart hub, capable of controlling a wide range of devices from practically any standard that exists. One of the issues with this, however, is that a smart hub acts as a home server, coordinating all sorts of events, actions, and of course providing users with an interface to control everything.
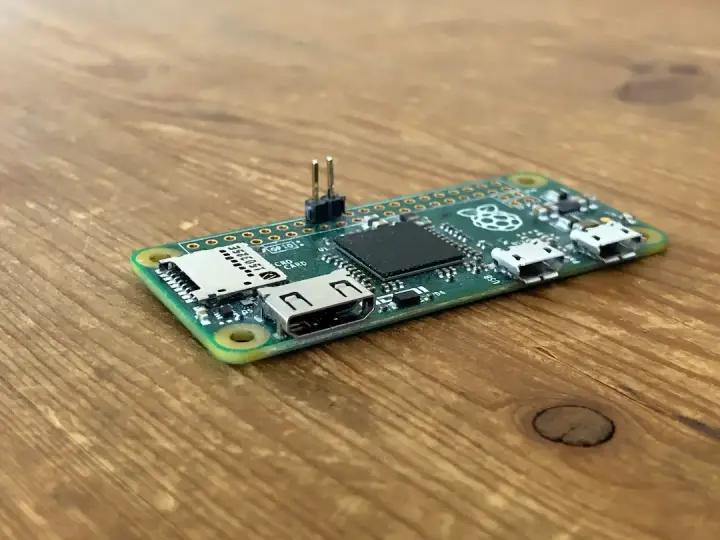
As this is the type of service that will need to run 24/7, it is going to need some dedicated hardware other than your main computer. The Raspberry Pi Zero W offers a way to do this on the cheap, with a list price of around 20$ for the board it is a desirable option to host all of the software services you need to run your smart home. Here we will go through the steps of installing Home Assistant on the Pi Zero W, along with a review of whether this configuration is sustainable.
Disclaimer: This post contains affiliate links. As an Amazon Associate, I earn from qualifying purchases.
Table of Contents
Required materials
- Raspberry Pi Zero W*
- Micro SD card - at least 16GB but 32GB recommended
- Power supply with 1.2A minimum. Important! Must have the right rating; otherwise, it will be slow!
- (Suggested) a case
- (Suggested) micro HDMI adapter
- (Suggested) micro USB adapter
*Note that while it is possible to use the regular Pi Zero for this purpose, network connectivity will be required meaning that either an ethernet adapter or a WiFi dongle will be necessary for this setup. As such, with the price difference being relatively small, the Zero W is recommended.
A kit may be an excellent option to get most of these materials all in one place and for a better price. Here is an example of such a kit, it provides almost every item on the list and includes some nice extras. Please note that this particular kit does not have an SD card so be sure to buy that too!
The items marked with "Suggested" are not strictly required to follow this guide, but you will have a much easier time troubleshooting any issues with the adapters. Additionally, a case can add just a little bit of extra polish to your build to make it look charming when it's done.
Warning: Be very diligent when buying the SD card. There are many reports of people receiving fake cards despite buying them from a reputable SanDisk page on Amazon. Always carefully inspect the card and connect it to a computer to verify the capacity before using it.
Step 1: Installing Home Assistant on the Pi Zero
The first step is to download the Home Assistant operating system image for the Zero. This link should download the correct image for the Zero, if not, head on over to the Github release page and download the image that ends with rpi0-w. The image may take a while to download as it is about 250MB in its compressed form, so while it is downloading, we will prepare what is needed to write the image to an SD card.
Download the installer version of balenaEtcher for your platform. Run the installer and follow the instructions on the screen to install the program. At this point, if you usually use a different program to write SD card images feel free to use that, but there is no guarantee that other software will write the image correctly, so it's best to use balenaEtcher if possible.
If your computer doesn't have an SD card slot (mine doesn't) you will need to use an adapter, there are plenty available on the web, and any of them should work fine. I was able to use my laptop to write the image since it has an SD card slot built-in. If shopping for an adapter, it's better to get one that supports micro SD directly as it will reduce the chances of something going wrong when using yet another adapter.
Writing the image
Once the image has downloaded, you should have a .gz file in your downloads folder. Extract this using the tool of your choice (7Zip, WinRAR) and place the image (.img) file anywhere you want - but remember the spot! Next, launch balenaEtcher using the desktop or start menu icon, and you should end up with a screen similar to the one below.
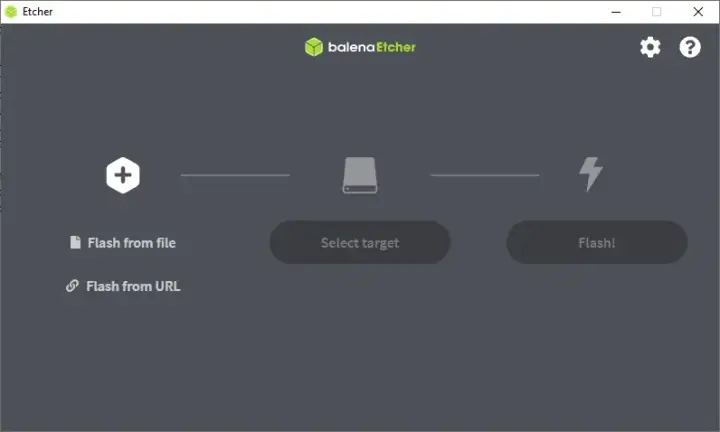
Click on the "Flash from file" button and navigate to the location where the extracted image file was saved. Once it is selected, click "open" to confirm your selection. Next, the following screen should appear asking you to choose the target location, in this case, the SD card reader.
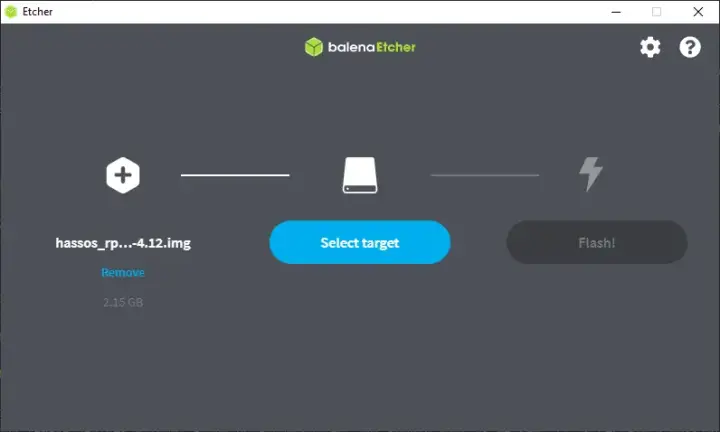
Click on "Select target" and pick the SD card reader from the list. Once the correct device is selected click on the button in the bottom right "Select (1)" to confirm your selection. The nice thing about this software is that it will hide devices that are likely not the ones you want to write images to, making it harder to accidentally overwrite something important. Examples of these include system drives and other internal storage that belong to the computer itself.
When the target selection is made, you should see a screen similar to the following. The "Flash!" button should be blue. Once you've confirmed that the image is right and that the SD card is the target device, hit the "Flash!" button to begin flashing the device.

After hitting the flash button, the screen will change to a status page that frequently displays the progress of the write operation. This can take a bit of time depending on the transfer speed of the SD card, and the USB port it is plugged into.
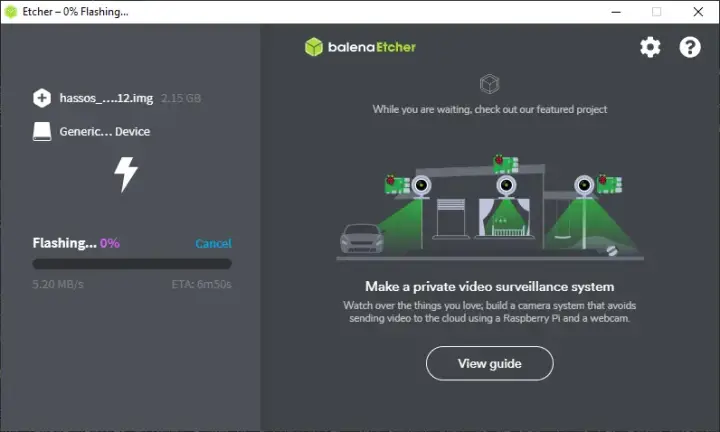
Once the progress bar reaches completion and the screen changes to a completed screen, double-check that the SD card has been appropriately ejected (mine wasn't). If it's not, eject the card and physically remove the SD card from your computer.
Step 2: Configuring the network (avoiding adapters)
It is recommended to configure the network before booting the Pi because the first thing the software is going to do is try to download updates. Another advantage of configuring things ahead of time is that once turned on, the Pi can sit far away and all configuration can be performed remotely. Do keep in mind though that it is possible to skip this step and manually configure the network on the Pi via a screen and keyboard - we won't detail that here though.
Start by plugging the SD card into a computer (not the Pi). Navigate to the drive as if it were a removable flash drive. The goal is to read the boot partition of the card and not other ones, such as the swap or system files. You know you are in the right partition if the volume label comes up as "hassos-boot" or something similar to that. If the wrong partition was mounted, search for a guide on how to mount different partitions for your operating system - it will be different for each one.
On Windows, the boot partition is the first partition, and so it is the one that gets mounted automatically. Once you can see the volume, navigate explorer to the root of the folder by clicking on it. You should see the Pi's boot files such as cmdline.txt, config.txt, and other files needed to boot. If you don't see these files, it probably means the wrong partition is mounted, so check that first. Otherwise, try writing the image again.
Once at the root folder (with config.txt), create a directory called "CONFIG", then inside that directory create another one called "network". You should end up with the following directory structure: "CONFIG/network". Within the network folder, create a file named "my-network" - notice the lack of extension. To accomplish this on Windows, I created a text file and renamed it ensuring to delete the extension. You might need to enable the "view file extensions" of explorer to do this correctly.

To configure that setting, click on "View" in the explorer toolbar, then make sure that the "File name extensions" checkbox is checked. After this you should be able to remove the extension when renaming, allowing you to create a file called "my-network".
Configuring the settings file
Open the "my-network" file with a text editor (on Windows, right click->open with, select Notepad) and copy and paste the template below into that file to enable Wireless connections.
[connection]
id=my-network
uuid=72111c67-4a5d-4d5c-925e-f8ee26efb3c3
type=802-11-wireless

[802-11-wireless]
mode=infrastructure
ssid=MY_SSID
# Uncomment below if your SSID is not broadcasted
#hidden=true

[802-11-wireless-security]
auth-alg=open
key-mgmt=wpa-psk
psk=MY_WLAN_SECRET_KEY

[ipv4]
method=auto

[ipv6]
addr-gen-mode=stable-privacy
method=auto
The first thing to do once your file looks like above is to head over to uuidgenerator.net and create a version 4 UUID. This will replace the value that is in the template and will make your connection unique. This value must be unique, so be sure not to use the one in the template as it could cause issues.
These settings will configure the Pi with DHCP, which essentially means that the device will have its network settings automatically configured. It is by far the easiest way to set this up and should work in most situations, however, if you know what you are doing and want to set a static IP, check out the official documentation over on Github to learn which options need to be set.
Change the SSID to match your WiFi and set the "psk" value to your password. If your WiFi network runs different settings, you may need to change some of the wireless-security section settings, so if it doesn't seem to connect to the network checkout the official configuration documentation to find all of the available options.
Once everything is set, save the file, eject the SD card, and remove it from your computer.
Step 3: Booting up the Pi
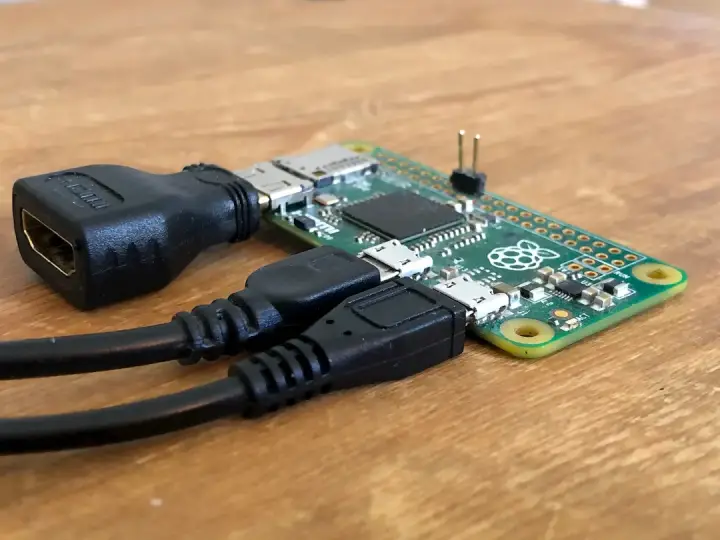
Begin by inserting the SD card into the Pi, then plug in any adapters you have such as the ones for HDMI and USB, making sure to plug everything you want to use in before applying power. If you are plugging in an HDMI monitor and USB keyboard using the adapters, you will be able to watch as the setup happens on screen. The keyboard should not be required, but it can help with debugging and settings any configuration options you may have opted not to do earlier.
Once everything is plugged in, connect the power cord to the Pi and into the wall. You should see an LED on the board begin to flash once the boot process is complete. If nothing is happening, there might be a boot problem and the only real way to troubleshoot this is with a monitor and keyboard. As soon as the Pi boots up, the software will begin downloading the latest version of Home Assistant from the internet.
At this point, the only thing to do is to wait for the system to configure its self. Unfortunately, if you don't have a screen connected there isn't a great way of knowing that it is working, so wait about 10 minutes then try to load the http://homeassistant.local:8123 URL in your browser (on any device connected to the WiFi, not the Pi).
Note that if your router does not support mDNS, this link will not work. If your router does not support mDNS, you will need to visit your router's admin interface to discover what the IP address of the Pi is. You should be able to find it listed under a list of "DHCP Leases" or a menu similar to that. The link will then be the same as before but with the IP of the Pi instead of "homeassistant.local".
Once the page loads, you are good to go! Home Assistant is now installed and ready to be set up with all of your smart devices. If you are having problems, the best thing to do is to connect a keyboard and monitor to the Pi to see what's going on. This does require adapters, however, so in the meantime try to verify that the network configuration is correct, that the device is powered on adequately, and that the WiFi network is accessible.
Optional elements
When you complete the onboarding process that is loaded when you first visit the control panel, you will be left with the main Home Assistant page where all configured entities can be managed. Visiting the "Supervisor" tab will allow you to see the "Add-on store". This store is where it is possible to install all sorts of optional software components.
Advanced users will want to install the SSH server at a minimum, this will allow remote terminal access without ever going back to the device its self. Feel free to take a look around and see if anything on the Add-on page interests you. Keep in mind that every add-on will have an impact on the performance of the Pi, so keep them to a minimum to ensure stability.
Should you use the Pi Zero for Home Assistant?
We now saw that it is more than possible to install Home Assistant onto a Raspberry Pi Zero W, but like many things just because we can, doesn't mean we should. In fact, the official documentation for Home Assistant OS says that the Pi Zero is not recommended for anything except testing. Is there any sense in using it then?
It turns out there are some use cases that can benefit from this setup. For very light installations involving only a few lights and switches, the Zero will be able to provide more than enough performance to satisfy the requirements of the software. Turning on or off devices and even monitoring the status of various sensors does not require excessive amounts of processing power, but add-ons are where the Pi Zero really starts to struggle.
The Zero is a small device, and its processor is minimal. As such, you should forget about doing anything like image processing or even music streaming. The full-sized Pi already has some issues with Home Assistant, and since the Zero is obviously less powerful, it isn't surprising that some workloads might present a problem for this setup.
Another area where the Zero suffers less than ideal performance is on the initial Home Assistant startup. It will often take a very long time to initialize everything that is needed to operate. This will get much worse over time and with the installation of integrations that must each be started individually when HASS starts up. Luckily, the startup seems to be one of the only places affected out of the box, once started things run acceptably fast.
In short, the Zero is suitable for simple installations that will only be controlling a handful of basic devices. In fact, it works quite well for this purpose despite not being recommended for any situation. However, if you are looking to run any sort of add-ons, the Zero is likely not going to cut it, and you will need a full-sized Pi like the 4 at the very minimum.


