How to Make Complex Automations With AppDaemon Easily
Updated on 2nd Jan 2021 19:18 in DIY, Home Assistant, Tutorial
Home Assistant is an amazing application that provides a way to connect all of your smart devices into a single controller regardless of what protocols they support. Many users encounter a problem after using it for a while because the automations you can create aren't always as powerful as they would like. There has always been the option to use Python by writing your own integration or script, but they are difficult to use just for an automation. Here we will be providing a beginner's introduction to Appdaemon by looking a few examples and explaining how they work. You'll be writing up awesome scripts in no time!

Table of Contents
Why not use an integration or a Python script?
Before we get into it, you may be wondering why we can't just use the built-in options. You could use the simple built-in "Python script" platform to write automations, but it is quite limited and only supports basic applications. I have tried to use the script platform on multiple occasions with little to no success due to its incredibly limited capabilities. Practically anything you can make with the script platform can also be made in the UI on modern versions, with some exceptions. Next, we have integrations which have the ability to do virtually anything - so why not use them? Writing an integration is not a trivial task and is far too much work just for the purposes of building an automation.
Integrations are generally meant to be for scripts that will extend the functionality of Home Assistant core to support a new class of device or to connect it with an external service, like Spotify. Some might be thinking about YAML automations, but the reality is that writing any sort of complex sequence of actions in anything other than a proper programming language is going to be needlessly difficult. Languages like Python were specifically built for people to tell a computer what to do, so we should take advantage of its great power. Before we get started, don't worry if you aren't good at Python or haven't coded before as what we are going to be doing is straightforward and easy to learn.
Getting started with AppDaemon
First of all, what is AppDaemon? To put it simply, AppDaemon is a framework for writing Home Assistant automations in Python. It provides a large number of utility functions that handle complexities for you, which allows you to work faster. You can code almost anything supported by Python (aka, a lot) which makes for a great platform. Another benefit is the extensive documentation provided on their website, which can help find the way to do a certain thing quickly.
Installing
There was a time when the installation was challenging for some as it involved placing files in the correct place manually along with some not so intuitive configuration changes. That all changed now that the official method of running Home Assistant is the supervised version as we can install AppDaemon from the Add-on Store. Head over to your Home Assistant dashboard to get started, then select "Supervisor" from the left menu. Then click on "Add-on Store" in the top menu bar. Search for "AppDaemon" and click on the add-on when it appears.

On the add-on page click "Install" - it should begin installing. Once everything is done, click on the "Configure" tab in the top and note your port number in the bottom of the screen.

Visiting the IP of your Home Assistant instance with that port will then provide you with the AppDaemon dashboard, which is where important runtime information will appear. You can make do without but I strongly recommend using it from experience - it will come in handy for debugging. If all that is working, good job! You've installed AppDaemon and are now ready to write some automations.
First automation: Getting started
For our first automation, we will do something simple: print text to the log when an event is triggered. An example file named "hello.py" in the "apps" folder of AppDaemon demonstrates the absolute basics. We're going to skip that and make our own that will be a bit more interesting. The first step of building any AppDaemon plugin is always to start with a Python class. To create this class, navigate to your Home Assistant folder, which can usually be accessed with a network share.
From the root folder, select "homeassistant" and then "appdaemon" within that. Finally, click on "apps" and create a new Python file in there. Your final path should look something like "<IP>\homeassistant\appdaemon\apps", where IP is the address of your HA instance. You can create a Python file in many ways, the easiest being to make a text file and to rename it. I always recommend using some sort of editor for writing these scripts as they make indentation and syntax a lot easier to see. There are many editors to choose from such as VSCode, Notepad++, Sublime Text, or a full IDE (Integrated Development Environment) like PyCharms, which is what I use.
Take your pick, and once you've got that installed, you can create a file named "first.py" under the "apps" folder in AppDaemon. Open it with your editor of choice, and you should see a blank file where we will now write our code. The first step is to declare our class which is basically just a way to tell AppDaemon that everything we will write in this file is related to a single plugin. To declare the class, write the following at the top of the empty file.
class First(hass.Hass):That says "hey, my name is First, and I'd like access to the Hass object" - we will see the Hass object later, but for now it's just important to understand that this declaration is establishing the script within AppDaemon. Before we get too far, that "Hass" parameter also needs to be imported so above the line you just created add the following:
import appdaemon.plugins.hass.hassapi as hassIf you are using a Python editor, you may have noticed that when you press enter after the first line, there is an indentation - that's required so be sure not to change it. Next, we will define our initialize function, which is how AppDaemon starts our app. Think of the initialize function as a door that AppDaemon knows how to open so that it can come and hook into our plugin. To define this function type the following on a line after the first and then press enter:
def initialize(self):On the next line, we will add a listener which will specify what we want to do when a certain event happens. Putting this line in the initialize function will tell AppDaemon that we want to do something when the specified event occurs. Add this line under the previous:
self.listen_event(self.first_event, "FIRST_EVENT")We are asking to be notified when the "FIRST_EVENT" event occurs and that a function called "first_event" within this class should run. At this point, your file should look like this:
import appdaemon.plugins.hass.hassapi as hass

class First(hass.Hass):

    def initialize(self):
        self.listen_event(self.first_event, "FIRST_EVENT")
Next, we are going to define the function we registered as a listener, so create the function by pressing enter a few times to get out of the initialize function, then write the following:
def first_event(self, event_name, data, kwargs):Be sure that the indentation is at the same level as the initialize function or it won't work properly! You can press tab to add an indent. Now let's print a message when this function is called. Add the following line under the first_event function:
self.log("Hey, it works!")The final code should look something like this:
import appdaemon.plugins.hass.hassapi as hass

class First(hass.Hass):

    def initialize(self):
        self.listen_event(self.first_event, "FIRST_EVENT")


    def first_event(self, event_name, data, kwargs):
        self.log("Hey, it works!")
We're done with the code! Now let's register our app with AppDaemon.
Registering with AppDaemon
Under the same path as the Python file you are working on, there should be a file called "apps.yaml". Within that file, you can register the script we just made as follows:
first:
  module: first
  class: First
Here the first line is just the name of our script. The "module" is the name of our Python file without the ".py", and the "class" is the name of the class we specified at the top of our script.
Testing it out
To test it, head over to the Home Assistant dashboard and visit the "Developer Tools". Then select "Events" from the top menu and type the name of our event "FIRST_EVENT" into the box.

Finally, click on "Fire Event". Now head over to the AppDaemon dashboard and look at the logs page, you should see the text "Hey, it works!" displayed.

Great job, it works! Now you can try something more advanced. Don't forget to delete the declaration in apps.yaml if you don't want to display that message every time.
Second automation: Using the Hass object
Earlier, we saw that the class we created used a "hass.Hass" object that we didn't use in the first automation. The Hass object is actually crucial to making automations for Home Assistant. In fact, it is the representation of Home Assistant within AppDaemon and is often used indirectly to control devices within your instance. Since it's so important, we will take a look at how it's used here.
To get started, create another Python file named "second.py" in the same location as before. Once again, declare a class inside the file as follows:
class Second(hass.Hass):Add the import to the top of the file:
import appdaemon.plugins.hass.hassapi as hassDefine the initialize function:
def initialize(self):Now, inside the initialize function, we can add state listeners that will react to changes that appear in Home Assistant, such as if a bulb turns on. We declare the state listener almost exactly like how we declared the event listener except that we provide an entity ID instead of an event name. Let's declare a listener for a light by putting the following under the initialize function:
self.listen_state(self.light_changed, "light.nodeid_10_dimmer")Remember to replace the entity ID (second parameter) with one that exists in your instance. Now let's create the "light_changed" function we specified in the listener declaration. Add the following function further down the file such as its indent is the same as the one for initialize:
def light_changed(self, entity, attribute, old, new, kwargs)There are quite a few more parameters, but we don't need to worry about all of them just yet. The important ones are the "entity" which will correspond to the ID of the entity that this state change is for and the "new" value which will be set to the value the entity changed to. Inside that function, I'm going to control another entity's state such that when the light is turned off, so is a second light. When the light is turned on, so will the second one.
We can use an "if" statement to perform a different action depending on the entity's new state. The way you change the state of an entity in AppDaemon is the same as in Home Assistant: you call a service. Changing the state of the entity directly does nothing but change the value in software! You must use the service to physically change the state of the device.
The entire thing will look as follows:
import appdaemon.plugins.hass.hassapi as hass

class Second(hass.Hass):

    def initialize(self):
        self.listen_state(self.light_changed, "light.nodeid_10_dimmer")

    def light_changed(self, entity, attribute, old, new, kwargs):
        if new == "on":
            self.call_service("light/turn_on", entity_id = "light.arilux_rgb_led_controller", brightness = 255)
        else:
            self.call_service("light/turn_off", entity_id = "light.arilux_rgb_led_controller")
Be sure to change the entity ID of the second light to one that exists in your instance.
Registering with AppDaemon
Just like we did for the first automation, add the relevant configuration to your apps.yaml as follows:
second:
  module: second
  class: Second
Now AppDaemon knows about our second automation, and once we save the file, it should start working.
Testing it out
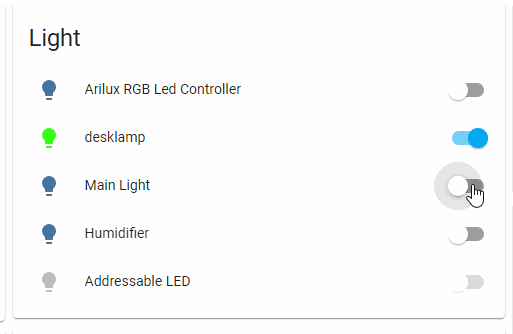
Testing this one is quite easy. Head over to Home Assistant and turn on (or off) the entity you specified in the listener. That's "Main Light" for me. When you toggle its state, the other light you specified should be reacting to the changes by mimicking them. Below is a demo of this silly automation in action.
There is some delay between my click and the actual state change due to a slow Z-Wave controller, but otherwise, it works exactly as expected! If you encounter problems, be sure to check the error log on the AppDaemon dashboard.
Debugging tips
It would be silly to think that every script we write will always work on the first try, so we often need to resort to debugging the code to understand what isn't working. Many people, programmers included, do not like debugging because it often feels like you are working for hours while getting nowhere. This can happen from time to time, but there are ways to minimize the complexity of identifying the problem. These methods can make the issue obvious while staring at the code for too long will begin to drive you insane - I've been there! Here are some tips for debugging your automation more effectively.
Check the error log
While it might sound obvious, the error log is a treasure trove of information that can help you find the source of your problem. In most cases, the error log will only be helpful if your plugin isn't working at all as the reason is likely due to an error. While writing this post, I had to refer to the error log on multiple occasions to see what I had done wrong. For one, I copied the function we used in the first automation and forgot to change the parameters to the ones a state listener should have. The error log told me quite clearly that I had made a mistake with my listener definition. For the first automation, I forgot to add the parameters to the listener, and the error I got is displayed below.

In that case, a quick look at the documentation showed me that the function should have been "first_event(self, event_name, data, kwargs)" instead of "first_event(self)". Whoops!
Add log statements
A classic programming technique is to add log messages all around the problematic code to get information about what might be going wrong. You can use log statements to see how far the code is going down a function or to display state information such as the current value of a variable. Take the following extremely naive example:
    def first_event(self, event_name, data, kwargs):
        ready = False;
        # other stuff
        if ready:
         self.log("Hey, it works!")
If the problem is that the message is never displayed and there are many conditions to satisfy in the if statement (here there is only one, but imagine multiple) you can use a print statement to see what the value of each variable is. Here we want to know if the problem is that the variable "ready" has the wrong value. Adding a log statement to the above code right above the if statement will quickly show us the problem.
    def first_event(self, event_name, data, kwargs):
        ready = False;
        # other stuff
        self.log("The value of ready is {}".format(ready))
        if ready:
         self.log("Hey, it works!")
In the AppDaemon console, we can see the value of ready:

At this point, we now know what the problem is, and we can correct it. While this example is probably not the kind of problem you will need to debug, it is a good demonstration of what you can do to fix complex code.
Outside help
If your debugging doesn't yield anything particularly useful, the next step is to browse the internet for an answer. The problem could be Python-related, so it might be easier to start by searching for your problem with the word Python. Then if that isn't helpful, you can search using "AppDaemon". As a last resort, if the answer to your issue can't be found anywhere, the best thing is to ask on the forums or on Reddit. There are plenty of people who use AppDaemon regularly that may know the answer and be able to help you out - just remember to be kind to the people giving you their time!
Further learning
Here we went over the basics and saw how we can use AppDaemon to write much more sophisticated automations than with the UI or YAML. At this point, you may wonder why you would bother using AppDaemon at all since you can do all of the examples we went over without it. The reality is that some things can easily be done in Home Assistant, while others are going to be extremely difficult or even impossible. An example of a relatively simple-seeming task that was really difficult to do in Home Assistant is a gentle wake up system. Check out my article about building a gentle wake up system here for more AppDaemon!
To see more example plugins, be sure to take a look at the AppDaemon documentation here. If you are going to be building plugins, the chances are you will need to see what functions are available and how to perform certain tasks with AppDaemon. The API documentation contains everything you need. It may seem big and scary, but in reality, you don't need to read everything - just do a search (or Ctrl-F) to find what you are looking for!


