How to Gift A Smart Home For Under 100$
Updated on 24th Oct 2020 16:20 in Home Assistant, Smart, Tutorial
Smart home technology is undoubtedly really awesome, but it is also not the easiest thing to get into. It would be pretty great to give the gift of a smart home to someone, but how is that possible without breaking the bank? Usually, getting started with anything smart-related requires purchasing an expensive hub and buying multiple smart devices that will also not be cheap. In this guide, we will demonstrate a great way to give the gift of a smart home to someone you care about for only about 100$!

Disclaimer: This post contains affiliate links. As an Amazon Associate, I earn from qualifying purchases.
Table of Contents
Required materials
There are quite a few required materials, but tracking them down shouldn't be too difficult as most of them are very popular. Be sure to check the materials list in the guide for setting up a smart hub on a Pi Zero to get all of the right parts for the Pi. Otherwise, the things needed for this guide are as follow:
- Raspberry Pi Zero (and accessories, check the materials list here)
- Lamp, like this one on Amazon
- Smart bulb, like this one on Amazon
Bulb selection
The easiest type of device to use is anything with HomeKit compatibility. The reason is that they are designed to work locally and implement a standard protocol across all products. Since these will not be using a remote system for the purposes of control, interfacing with them becomes easy. Any HomeKit controller will know that a bulb has specific capabilities and will understand how to send those commands, without being made by the same company. This is a huge advantage for those looking to build a smart home without breaking the bank as buying everything from one place is sure to increase costs.
Note that you aren't limited to HomeKit devices, however. Take a look at the Home Assistant integrations page, under the light section. Anything specified there is compatible with Home Assistant, which means that you have a vast selection that isn't limited by any stretch of the imagination. There are several problems with products that rely on the company's systems being online to function. Still, those are also more complicated to set up in some cases, so for the purposes of this guide, we will proceed with a HomeKit bulb.
Just know that you can use many other types, even stuff that isn't listed there! Many members of the community have built interactions allowing the use of unsupported devices. These are called custom integrations, they are outside the scope of this article, but they can be a great way to add a wider variety of equipment to your smart home. Usually, doing a search for the brand and name of the product along with "Home Assistant" will yield results of others attempting to do the same thing.
Overview
The general idea is to create a controller super cheaply by leveraging the power of Home Assistant, which is totally free. It is not an off the shelf solution like Smartthings or Alexa, but it is fairly easy to deal with once installed. It also offers a degree of customization and privacy unparalleled by the commercial offerings, even at higher price points. The Pi Zero is very cheap and will work for most basic scenarios, as explained in the article about installing that we will get to in a minute. It's important to realize that the Zero is a tiny processor that will serve most people well but will struggle with enormous installations or situations of intense processing.
Next, to make the gift a bit more interesting, we will also include a single, smart device to go with the controller. A lamp is a nice and cheap way to include one of the most classic smart devices: lighting. We make the choice of using a smart bulb as they are cheap and one of the easiest ways of implementing lighting. Lamps are also a perfect place to put these bulbs as we can hide the switch and pull cord to make it difficult to accidentally turn off. The one linked above also includes a plug and a USB port which can be convenient for charging things on a nightstand.
To outline the general procedure, we start by configuring the Pi and the bulb on your own WiFi network. Then once all of the configuration is done, we pack up the parts and take them to the destination. At the final location, we simply reconfigure the bulb to connect to the WiFi network of the recipient. To make things easier, before leaving, we update the configuration on the Pi's SD card to reflect the network settings of the destination.
Installing Home Assistant
Home Assistant is free and open-source software designed to help empower users to build their smart home their way. It includes no vendor locking and supports almost every manufacturer out there. It isn't as user friendly as some of the off the shelf solutions, but a large community combined with support for almost everything makes this downside worth taking. For any given question or problem, there are almost certainly people discussing it on the forum. They can actually be even more helpful than the forums of other systems as the members of this community can build extensions to the software to support new situations.
To get started with installing Home Assistant on the Pi Zero, simply follow my guide here. It might look a bit intimidating, but I promise it is not as difficult as it sounds, and you will be delighted to be a part of such a wonderful community.
Configuring the bulb
Once Home Assistant is set up correctly, we can configure the bulb within the system. When it's configured, it should stay configured forever unless something drastically changes. We will continue with the assumption that you have a HomeKit bulb, and more specifically, the Meross HomeKit bulb linked at the beginning of the post. If you don't, it is just a matter of following the instructions on the device to get it initially set up. The next steps will depend on if you have an iOS device or not. Be sure to screw the bulb into the lamp and plug it into the wall for this step.
iOS Setup
Setting up a HomeKit device in iOS is really easy. To do so, simply open the Home app and click on the "plus" icon in the top left. Tap "Add accessory", and now a screen should pop up asking for a code. It is now simply a matter of either scanning the QR code that came on the box of the bulb or manually typing in the number at the bottom. HomeKit will now perform its magic and should ask you which network to connect the device to, where you will select your WiFi. Finally, the device will now appear in the Home app, and you can move on to the next step.
Note: in some situations, it is possible that the process of adding the device via the Home app could pair it to the wrong controller, which will be apparent when it comes time to pair the bulb with Home Assistant. If this is the case, try unpairing the device and performing the steps in "Non-iOS Setup" to get the bulb on the network without pairing it to HomeKit.
Non-iOS Setup
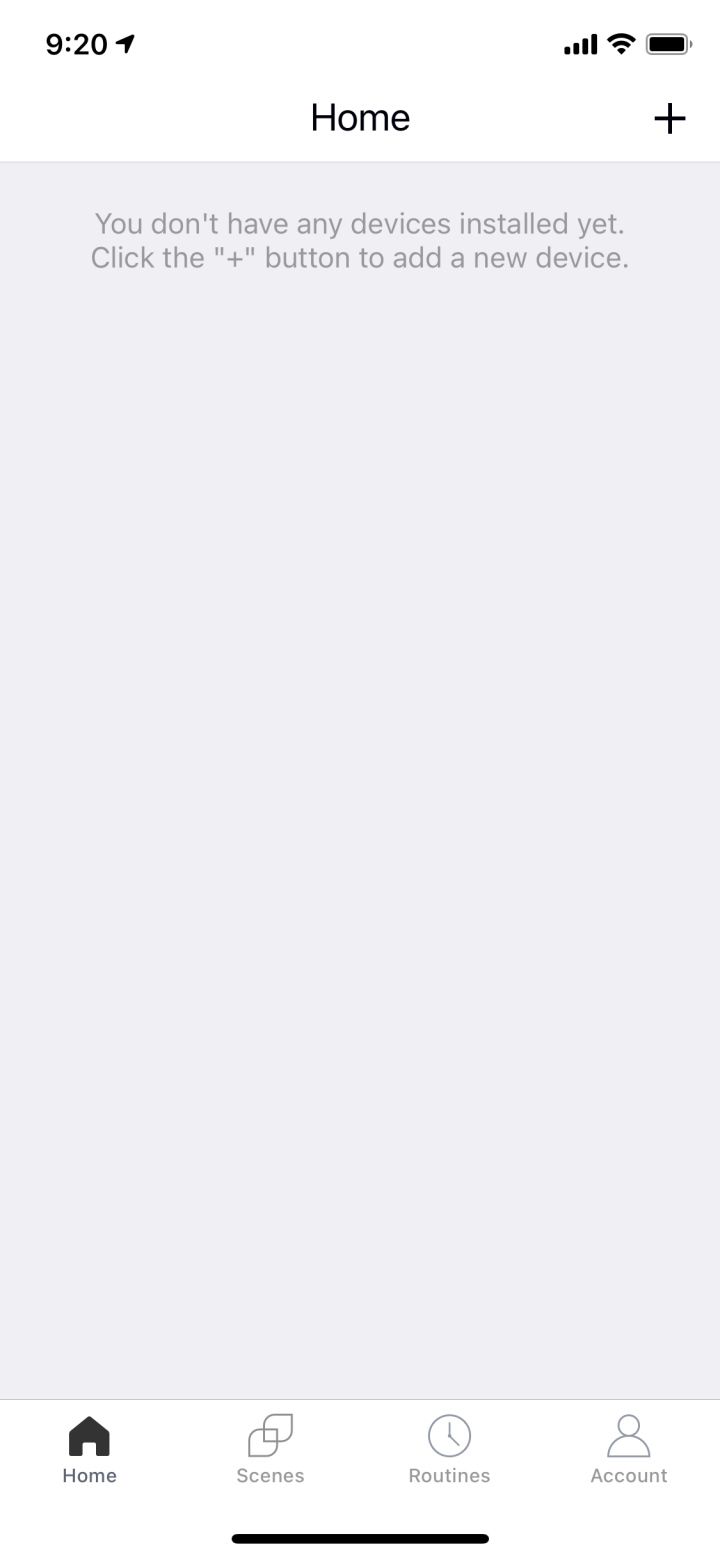
If you don't have an iOS device, there are no worries as you can still configure everything, although it will be less smooth. First, download the Meross app from the app store, then create an account. Next, click on the "plus" icon in the top left to add a new device.

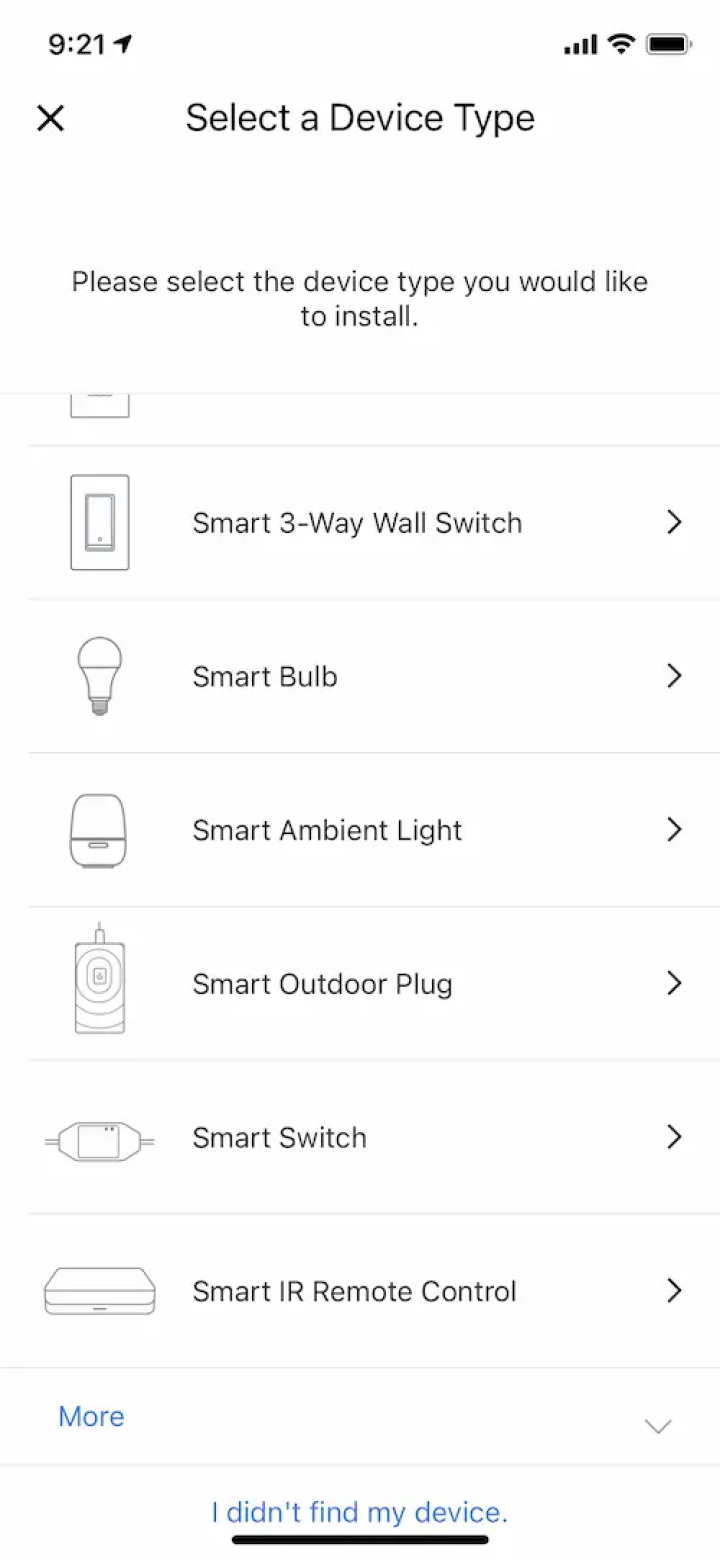
Be sure you are in the "Home" tab on the bottom of the screen. You should now see a list of possible devices. Scroll down until you find "Smart bulb" and click on it. Follow the instructions on-screen to connect the bulb to the network.

Note: you will need to redo this when you deliver the gift, as it needs to connect to their network. For now, we are just connecting it to our network so we can configure everything and test that it works well.
Configuring Home Assistant
The configuration is identical to the one in my post about using a Raspberry Pi as a HomeKit Hub. As a result, we won't repeat all of the instructions here. Simply follow the steps in the "Setting up the software" section. When you install the HomeKit controller integration, you should see the bulb we joined to the WiFi network earlier appear. It will then be added to the Home Assistant instance as a HomeKit device.
Assuming you haven't changed anything else, the new bulb should appear on the main page of Home Assistant. Try it out! Click on the toggle switch next to the name you gave the bulb in the UI to turn it on and off. Clicking on the name of the bulb will bring up a window where you can pick the color using a wheel as well as adjust the brightness. Note that the color picker is only displayed if the bulb is toggled "on".

Finishing touches
That's it! You are ready to give this to someone, there are just a few final things to take care of once everything works for you. You will need to be present to help with pairing the bulb to the new network, as it is currently connected to your WiFi. The other thing to take care of is the Pi, which will also need to be connected to their WiFi to work correctly. The absolute easiest way to do that is to perform step 2 of this guide again but this time using the information of your friend's WiFi. To do that, shut down the Pi, which can be done by going to Supervisor->System->Shutdown in the Home Assistant UI.
Once everything is shut down, unplug the power from the Pi and pop the SD card back into your computer. Then perform the steps outlined in step 2 of the guide to put in the correct WiFi information. Once the Pi is powered back on, it will remember all of the settings we configured but will now have the new network set up. Once it powers up at the destination, it should automatically connect to the network. If there are any problems, you can always connect a mouse and keyboard to the Pi to figure out what's going on.
Otherwise, that's it for real! Enjoy the reaction to this wonderful gift, all for the price of many other common gifts!


